S.Y.B.Sc. Zoology Sem I Paper II,
Fishery science syllabus
PEARL CULTURE IN INDIA
1.1 Introduction
Pearls have been known to mankind since the beginning of civilization. They are highly esteemed as gems for their beauty and splendour. These structures are secreted by the mantle (i.e., the skin) of pearl oysters in response to irritations caused by external or internal stimuli such as sand grains, molluscs eggs, parasites, detritus, and other foreign particles. Many attempts have been made to culture pearls in freshwater mussels. In the 13th century the Chinese fixed small Buddha figures inside freshwater mussels which became covered with a pearly layer. After considerable perseverance and study on the mode of pearl formation, success was achieved early in this century in Japan on the production of spherical cultured pearls. The Japanese grafted a piece of mantle with a small bead in a pearl oyster and reared the oyster in protected coastal waters with favourable environmental conditions.India has one of the highest demand for pearls for setting in jewellry, and is particularly famous for its pearl oyster resources which yield superb pearls. The pearl oyster fisheries are located in two main areas: 1) in the Gulf of Mannar off Tuticorin coast and 2) in the Gulf of Kutch on the northwest coast of the country. The pearl oysters are found in two different environments in the two localities, at depths up to 23 meters in the Gulf of Mannar, in the intertidal zone in the Gulf of Kutch. These bivalves form large beds on hard substrata in the Gulf of Mannar, while they are sparsely distributed in the Gulf of Kutch. The pearl oyster resources in the two areas have been fished for pearls until the early 1960's.
After surveying the pearl oyster resources and fisheries in the two Gulfs at the beginning of the century, Hornell (1916) recommended that in order to maintain pearl fisheries profitably it was necessary to develop techniques to induce the Indian pearl oysters to form pearls by artificial means. In response, the then Madras Government Fisheries Department carried out preliminary research at the Marine Biological Station in Krusdai Island, Gulf of Mannar. Research focused mainly on the biology and ecology of several species. The oysters were reared in cages and induced to form pearls. That work managed to produce only two poorly shaped pearls and a half-pearl attached to the shell. Efforts in Gujarat did not meet success either.
In October 1972 the Central Marine Fisheries Research Institute started a pearl culture research project at Tuticorin. Success came in July 1973 when a perfectly spherical pearl was produced. This breakthrough was achieved by introducing a graft of the oyster mantle in the gonad of an adult specimen together with a shell bead nucleus. This is a delicate operation.
Following this success an Ad-hoc Research Scheme on pearl culture under the Indian Council of Agricultural Research (ICAR) was implemented (from 1973–78) by the CMFRI in association with the Department of Fisheries, Government of Tamil Nadu. During this Research Scheme, production of cultured pearls by multiple implantation was successfully achieved. Several aspects of pearl formation and pearl oyster biology and ecology -- highly important for successful pearl culture -- were investigated.
The CMFRI also succeeded in artificially spawning Pinctada fucata, rearing of larvae, and producing seed in the laboratory by hatchery techniques. This breakthrough is very important in light of the difficulty in obtaining sustained supplies of oysters from natural banks for culture purposes. Recently the CMFRI also produced seed of the black-lip pearl oyster, Pinctada margaritifera which produces the highly valuable black pearl.
To follow-up on the development of pearl culture technology, the Tamil Nadu Fisheries Development Corporation and the Southern Petro-chemical Industries Corporation Ltd. established in 1983 a company to produce cultured pearls, with the farm at Krusadai and the nucleus implantation centre at nearby Mandapam. Since then other companies have became interested in taking up pearl culture on a commercial scale.
The CMFRI is making efforts to promote the pearl culture technology by conducting short- and long-term training programmes. Scientific and technical personnel from fisheries institutes in all of the maritime states as well as from the Fisheries Faculties of Agricultural Universities are given the opportunity to be trained in these programmes.
This manual covers various aspects of pearl oysters, such as taxonomy, morphology, anatomy, ecology and pearl oyster seed production through hatchery techniques, and pearl oyster framing.
2.1 Taxonomy
The true pearl oyster belongs to the genus Pinctada (Roding) under the family Pteriidae, order Dysodonta. Members belonging to the Pteriidae family are characterized by a straight hinge with 1–2 small tooth-like thickening, a cavity below the anterior angle for the byssus, and usually a scaly surface of the outer shell valves. The family includes the pearl oysters belonging to the genus Pinctada and the winged oyster shells of the Pteria genus. In Pteria spp. the shell width is much longer than the height and the hinge angle is prominent and pronounced.In Pinctada spp. the hinge is rather long and straight, the long axis of the shell is at a right angle to the hinge, the left valve is slightly deeper than the right and there is a byssal notch on each valve at the base of the anterior ear.
Six species of pearl oysters, Pinctada fucata (Gould), P. margaritifera (Linnaeus), P. chemnitzii (Philippi), P. sugillata (Reeve), P. anomioides (Reeve) and P. atropurpurea (Dunker) occur along the Indian coasts. Their morphological characteristics are as follows:
Pinctada fucata (Gould)
The hinge is fairly long and its ratio to the broadest width of the shell is about 0.85 and that to the dorsoventral measurement is about 0.76. The left valve is deeper than the right. Hinge teeth are present in both valves, one each at the anterior and posterior ends of the ligament. The anterior ear is larger than in the other species, and the byssal notch, at the junction of the body of the shell and the ear, is slit-like. The posterior ear is fairly well developed. The outer surface of the shell valves is reddish or yellowish-brown with radiating rays of lighter colour. The nacreous layer is thick and has a bright golden-yellow metallic lustre (Plate I A).
Pinctada margaritifera (Linnaeus)
The hinge is shorter than the width of the shell and has no teeth. The anterior border of the shell extends in front of the anterior lobe. The byssal notch is broad. The anterior ear is well developed while the posterior ear and sinus are absent. The posterior end of the shell meets the hinge almost at a right angle. Shell valves are moderately convex. Externally, the shell is dark grayish-brown with radially disposed white spots. The nacreous layer is iridescent with a silvery lustre except distally where it is black. This pearl oyster is also known as the Black-lip pearl oyster due to the dark marginal colouration of the shell. The width of the nacreous region at the hinge is about 2/3 that of the broadest part of the valves (Plate I B).
Pinctada chemnitzii (Philippi)
The hinge is almost as long as the antero-posterior measurement of the valves. The posterior ear is well developed and the convexity of the valves is less than in P. fucata. The anterior and posterior hinge teeth are present, the former is small and rounded and the latter prominent and ridge-like. The posterior ear and the posterior sinus are well developed. The shell valves are yellowish externally with about four or more light brownish radial markings from the umbo to the margin of the shell. The growth lines of the shell are broad. The nacreous layer is thin and bright, while the non-nacreous layer is yellowish-brown (Plate I C).
Pinctada sugillata (Reeve)
The hinge is considerably shorter than the antero-posterior axis of the shell with a ratio of 1:1.3. The anteroposterior measurement is almost equal to the dorso-ventral measurement. The anterior ear in both valves is small and the byssal notch is a moderately wide slit. The anterior ears are slightly bent towards the right. The posterior ear and sinus are poorly developed. The convexity of the valves is not prominent, especially that of the right valve. The hinge teeth are small and the posterior one is slightly elongated. The shell valves are reddish-brown with six yellowish radial markings (Plate I D).
Pinctada anomioides (Reeve)
The hinge is shorter than the width of the broadest region of the antero-posterior axis of the shell with a ratio of 1:1.2–1.5. The hinge and dorso-ventral axis have a ratio of 1:1.4. Hinge teeth are absent or poorly developed. The anterior ear is moderately developed and the byssal notch at its base is deep. The posterior ear and sinus are absent. The shell valves are translucent and externally yellowish or grayish. Some shells have faint radial markings. The nacreous layer is slightly iridescent (Plate I E).


Pinctada atropurpurea (Dunker)
The shell is roundish and its hinge narrow. The valves are thin, translucent and moderately convex. A poorly developed anterior hinge tooth is present in some oysters. The shell valves are copper coloured (Plate I F).
2.2 Distribution
Pearl oysters of the genus Pinctada are widely distributed in the world. They occur in several seas of the tropical belt and in the sub-tropical region. Although a number of species of pearl oysters have been identified, only a few have been found to produce pearls of good quality and commercial value. Of these, P. maxima, P. margaritifera and P. fucata stand out. The gold/silver-lip pearl oyster P. maxima occurs along the north coast of Australia, Burma, Thailand, Indonesia, Philippines and Papua New Guinea at depths ranging from low tide level to 80 m. The black-lip pearl oyster, P. margaritifera is widely distributed in the Persian Gulf, Red Sea, Sudan, Papua New Guinea, Australia, French Polynesia, Indonesia, Andaman and Nicobar Islands, Southwestern part of the Indian Ocean, Japan and the Pacific Ocean. The occurrence of this species is sporadic along the coasts of mainland India. The pearl oyster P. fucata is distributed in the Red Sea, Persian Gulf, India, China, Korea, Japan, Venezuela and Western Pacific Ocean (Fig. 1).In the Indian waters six species of pearl oysters occur but only P. fucata has contributed to the pearl fisheries in the Gulf of Mannar and Gulf of Kutch. In the Gulf of Mannar, the pearl oysters occur in large numbers on the submerged rocky or hard substrata known as paars. The paars lie at depths of 12 to 25 m off the Tuticorin coast along a stretch of 70 km. In the Palk Bay, P. fucata occurs sporadically on loose sandy substratum attached to submerged objects in littoral waters. In the Gulf of Kutch, the pearl oysters are found as stray individuals on the intertidal reefs known as khaddas. In the southwest coast of India at Vizhinjam, Kerala coast, large numbers of spat of P. fucata have been collected from mussel culture ropes. The blacklip pearl oyster, P. margaritifera is confined mostly to the Andaman Islands where it is common in some places. From Lakshadweep, settlement of spat of P. anomioides has been observed on the ridges of rocks and corals.


MORPHOLOGY AND ANATOMY
3.1 Morphology
3.1.1 Shell features
The shell of Pinctada fucata is about 1.5 mm thick over the greater part. The growth edge or projecting lamellae are laid down by the oyster at successive intervals on the distal border. The non-nacreous border of the inner surface of the valves are characterized by brownish or reddish patches which coincide with the external rays.The adductor scar is elongated and sub-central. The pallial line and scars are caused by the insertion of the pallial muscles in fan-shaped bundles of fibres radiating outwards. There are 12–15 insertion scars between the umbo and antero-ventral border. Besides these distinct scars, there is a narrow continuous insertion band confluent with the posterior and ventral edges of the adductor scars. Its scar merges with that of the adductor scar. The hinge is narrow and runs along the greater part of the straight dorsal edge. Elongated ridge-like teeth are present at the anterior and posterior ends of the ligament.
3.1.2 Shell structure
The shell is composed of three layers. The very thin outer layer is uncalcified cuticular conchiolin layer or periostracum. This is an extremely delicate horny layer which allows the colour of the layer below to show through and usually becomes worn off in old shells. At the free margin of the shell the periostracum is very thin, transparent and extends beyond the calcareous matter. It is reflected to join the surface of the ectoderm cells of the mantle edge in the longitudinal groove where it is secreted.The middle or prismatic layer shows a cellular structure formed of calcareous prisms or columns running vertically to the surface and appearing polygonal in section. The prismatic layer is deposited by the mantle epithelium near the free edge just behind the margin which forms the periostracum and many such layers on fusion are formed successively, each new one beneath the last, as the shell grows. The innermost nacreous or mother-of-pearl layer is composed of numerous fine lamellae of aragonite crystals (Fig. 2).

3.2 Anatomy
3.2.1 Mantle
The free edge of the mantle lobe is thick, pigmented and fringed with branched tentacles. The pallial edge of the mantle is attached to the shell, a little away from the margin. Each pallial lobe may be divided into three parts, the central, distal or muscular and marginal mantle.3.2.2 Foot
The foot is highly mobile, tongue-shaped organ capable of considerable elongation and contraction (Fig. 3). It arises from the anterior region of the visceral mass nearly midway between the mouth and the intestinal lobe and the anterior branchiae flanking it on either side. The dorsal portion has more chromatopores while the ventral portion has the pedal groove. The major part of the foot is composed of a network of fibres running in various directions, thus ensuring a wide range of movement. It is extensively penetrated by blood spaces and the organ is highly contractible.3.2.3 Byssal gland
The byssus gland organ (Fig. 3) is located ventrally at the proximal end of the foot. The byssal gland lodges the common root of a bundle of stout, laterally compressed bronze-green fibres: the byssal threads. Each fibre of the byssus anchors the pearl oyster to rocks and other hard objects by means of a discoid attachment at the distal extremity. The anterior edge of the mouth of the byssal gland passes into the pedal groove (Fig. 3) extending along the whole of the remaining length of the ventral surface of the foot.3.2.4 Muscular system
The pearl oyster is monomyarian, possessing only the posterior adductor (Fig. 3), the largest and the most important muscle in its body. The adductor muscle stretches transversely across the body from valve to valve. It is a massive wedge-shaped bundle of muscle fibres. The narrow end points upwards and lies immediately behind the ventricle of the heart. The terminal part of the rectum runs in the middle line along the posterior surface. It has two distinct regions, one a narrow tendonous strip made up of white glistening fibres forming the posterior border, the other composed of broad and massive semitranslucent fibres occupying the remainder of the mass. The power exerted by the adductor in bringing the valves together by its contraction is considerable with rapid action resembling a ratchet mechanism.The retractors of the foot are a pair of symmetrically disposed muscles lying in the horizontal plane of the body.
The muscles are V-shaped and originate from the byssal gland. Their ends are attached to the right and left valves without making a separate scar in the nacre.
The foot has four levators, two anterior and two posterior. The contraction of the anterior levator causes the foot to be retracted and raised dorsally. The posterior levators are short and insignificant, originating at level with the mouth, passing through the visceral mass to be attached to the valves behind the anterior levator scar. The branchial muscles cause the shortening of the gills and withdrawal of their posterior extremities. They run within each ctenidial axis from end to end, close to the dorsal edge. There are also muscle bundles running longitudinally down on each side of the principal filaments. The pallial muscles are retractable and together they constitute the orbicular muscle of the mantle. With the exception of heart and indistinct striations on larger portion of the adductor muscle, the muscle fibres throughout the oyster's body are non-striped.
3.2.5 Digestive system
The oesophagus, stomach, and the greater portion of the intestine lie within the viscero-pedal mass. Two horizontal lips, the labial palps, conceal the aperture of the mouth. They are smooth on the surface, and grooved on the opposite side close to the mouth aperture. The mouth is a large, slit-like depression placed transversely between the anterior levator muscles of the foot (Fig. 3). The mouth leads into a straight, dorso-ventrally compressed and ciliated oesophagus. The folds and depressions diversify the walls and floors of the stomach and break them into definite areas. The tissues consist largely of greenish-brown masses often termed as liver or digestive diverticula (Fig. 3). A peculiar (gelatinous) rod, the crystalline style, flattened and oblique, occupies a subcentral position anterior to where the postero-ventral fold disappears midway along the floor. The head of the crystalline style projects out of the sac where it is formed and across the cavity of the stomach where it bears against an irregular area of cuticle known as the gastric shield (Fig. 3).The intestine may be divided into three sections, namely, the descending and ascending portions and the rectum (Fig. 3). The valvular folding of the intestinal ridge gives way to the ascending portion and curves backwards along the base of the visceral mass to the left of the descending intestine. From the point of intersection, the ascending intestine turns sharply upwards, running parallel and closely adjacent to the upper part of the descending portion (Fig. 3). The rectum runs posteriorly through the upper part of the pericardium (Fig. 3). Beyond this it curves vertically and passes around the posterior part of the adductor muscle in the median line and ends by the anus in an erectile ear-like process. The anal papilla is comparatively large and slightly curved.
3.2.6 Respiratory system
The gills consist of four crescent-shaped plates, two halfgills on each side which hang down from the roof of the mantle cavity like book leaves. They represent a series of ciliated sieves, providing an efficient feeding surface. Two rows of long delicate branchial filaments are inserted at right angles along the whole length of the axis or vascular base which extends from the ventral border of the palps anteriorly curving round ventrally and posteriorly to a point opposite the anus. Its convexity extends first forwards and then downwards. Where they terminate, the mantle lobes of the two sides are slightly united by the inner mantle folds thus dividing the mantle cavity into a large inhalant chamber containing the gills and a much smaller exhalant chamber. Water enters by one and leaves by the other.The common base of each ctenidium is a vascular ridge reaching from the anterior end of the gills. Hollow outgrowths, the inter-lamellar junctions, containing branches from the afferent vessels, convey blood from the axial trunk to the base of reflected lamellae. The blood enters the individual filaments, flows outwards to the free margin, passing over to the direct filaments, returning inward to the branchial or ctenidial axis, where it joins the efferent vessel by openings along each side. The filaments are joined chiefly by the inter-locking stiff cilia of the large ciliated discs which occur at intervals throughout their length. The normal function of the ordinary cilia on the branchiae is to create a current of water which enters the pallial chamber and passes over and through the branchial lamellae. They serve to purify the blood flowing in the filaments and to convey the food particles to the mouth.
3.2.7 Circulatory system
This system consists of a heart and a series of arteries which lie above the adductor, and contained in a pericardium. The heart consists of a single ventricle and a pair of contractile thin walled auricles, one on each side. They receive blood from the body by way of the gills and mantle, and pass it to the ventricle. Back-flow of blood is prevented by valves. Blood is driven by contractions into the anterior and posterior aorta. The latter is short and supplies blood to the adductor muscle, rectum and anus. Blood is supplied to the rest of the body by the anterior aorta through a series of minor arteries. These open into the sinuses or blood spaces in which blood circulates slowly. The aorta communicates with a pair of large blood vessels that run around the margin of each mantle lobe. The deoxygenated blood is collected in veins which carry it either into the gills or excretory organs. From the kidney it is pumped into the marginal vessel of the mantle by a pair of accessory hearts. The blood from the mantle, together with that from the gills, returns to the heart through efferent branchial vein by way of auricles. The blood of the pearl oyster is colourless.3.2.8 Excretory system
The excretory system consists of a pair of nephridia and numerous small pericardial glands projecting from the walls of the auricles. The nephridia are two large symmetrical pouch-like sacs located on either side in the hinder half of the viscero-pedal mass. Each nephridium opens into the pericardium by a wide duct and to the exterior by a minute pore. The nephridia inter-communicate by a wide channel beneath the auricles. The external renal aperture is a minute oval opening with a sphincter muscle. It opens immediately below the genital aperture within an inconspicuous lipped slit at the junction of the inner plate of the inner gill with the visceral mass at a point about midway between the ventral border of the latter and the base of the foot.The passage connecting the right and left nephridia is wide and lies beneath the auricles. It has thin membranous walls and is bounded behind by the lower part of the pericardium and in front below with the body wall and forms part of the root of the adductor embayment of the suprabranchial chamber. The reno-pericardial tubules are a pair of wide lateral prolongations of the pre-cardiac part of the pericardium. They are thin walled, membranous and directed forwards. The aperture is a curved slit, with the concavity ventrally. The accessory pericardial glands on the walls of auricles have excretory function.
3.2.9 Nervous system
The nervous system is laterally symmetrical and has three pairs of ganglia, (1) the cerebral ganglia at the sides of the oesophagus, (2) the pedals joined to form a single ganglion at the base of the foot and (3) a pair of large visceral or parieto-splanchnic ganglia lying upon the anterior surface of the adductor. The stout paired cerebro-visceral connectives link the cerebral ganglia with the parieto-splanchnic ganglia, while a pair of cerebro pedal connectives join the cerebral ganglia with the pedal nerve mass. The cerebral ganglia are supra-oesophageal in position and a nerve cord or commissure forms the two parieto-splanchnic ganglia (Visceral ganglia). The cerebro-pedal connectives arise from the posterior and outer sides of the cerebral ganglia and run downwards within the visceral mass just behind the levator muscles of the foot to the pedal ganglion. Three principal nerves arise from the pedal ganglion and innervate the foot and the byssal gland. Each of the visceral ganglia receives from above the stout cerebro-visceral connective, the two ganglia themselves being united by a single transverse visceral commissure. Each branchial nerve leaves the ganglion at the anterior lateral corner, turns down into the base of the gills and then backwards to the posterior tips following the afferent vessels. The posterior pallial nerves emerge from the posterior end of the visceral ganglion. From the base of each, a stout nerve passes straight back and reaches the pigmented pallial sense organs of its respective side, a little anterior to the anus. The ramification of the pallial nerves in the muscular marginal region of the mantle and their anastomosing forms a complex network of nerves, the “pallial plexus.”3.2.10 Reproductive system
The sexes are separate except in occasional cases. The gonads are paired but asymmetrical. They form a thick envelop covering the stomach, liver and the stomach, and the first two sections of the intestine, connecting a greater part of the outside of the proximal portion of the viscero-pedal mass (Fig. 3). No portion of the reproductive glands extends into the foot or into the mantle. The male and female gonads are indistinguishable from external appearance in the initial stages. Both are creamy yellow in colour. In the mature stage, the male gonad is pale creamy and the female gonad yellowish creamy. The gonads of the two sexes consist of branched tubules with myriads of succate caecae, the alveoli. The spermatozoa and ova develop in these. The accumulated ripe gametes fill these alveoli and tubules and later pass into three trunks which converge into one which leads to the external genital aperture. The latter is situated dorsal to the renal aperture of the same side.
BIOLOGY AND ECOLOGY
4.1 Biology
4.1.1 Food and feeding habits
Like other bivalves, the pearl oyster is a filter feeder. Minute food organisms in the water, enter inside the mantle cavity along with water current passing though the narrow slit formed by the inwardly directed edges of the pallial lobes. These are carried towards the branchiae which act as fine strainers arresting every particle in the water current. The food particles collected thus are carried by the cilia to the crest of the branchial lamellae and from there they are directed by the labial palps into the mouth. The labial palps have the ability to reject unwanted materials like mud particles. Unicellular organisms including infusorians, foraminifers and radiolarians have been found in the stomach of pearl oyster. Minute embryos and larvae of various organisms, algal filaments, spicules of alcyonarians and sponges were also observed. The presence of diatoms, flagellates, larvae of lamellibranchs, gastropods, heteropods, crustacean nauplii, appendages and frustules of copepods, spicules of sponges and unidentified spores, algal filaments, detritus and sand particles were also noted in the stomachs and intestines of cultured P. fucata collected off the coast of Tuticorin. Oysters from natural beds were also found to contain the same organisms in their stomach and intestine.4.1.2 Age and growth
The age and growth of pearl oysters in the Gulf of Mannar have been studied in detail. Observations made on cultured pearl oysters collected near Krusadai Island and at Tuticorin show that the oysters can grow to a height of about 35–45 mm at the end of one year, 50–55 mm at the end of the second year, 55–60 mm at the end of the third year, 60–65 mm at the end of the fourth year and 65–70 mm at the end of the fifth year. The weight of the oysters was 10, 30, 45, 60 and 70 g at the end of the first, second, third, fourth and fifth years, respectively. Tracing the growth history of P. fucata produced in the hatchery and grown in the farm at Tuticorin Harbour during 1983 revealed that the species attains a modal size of 47.0 mm at the end of first year, 64.5 mm at the end of the second year and 75.0 mm at the end of the third year. The corresponding weights at ages 1 to 3 years were 8.3, 31.6 and 45.4 g, respectively.The pearl oysters have been estimated to have a longevity of 5–5.5 years in natural beds, but have been observed to live up to seven years when reared in the farm.
4.1.3 Reproduction
In pearl oysters, the sexes are separate although hermaphrodite conditions have been observed in some individuals. Change of sex takes place in some oyster towards the end of spawning. Based on the external appearance, microscopic examination of smears and histological studies, five developmental stages have been distinguished in the gonads of P. fucata off Tuticorin coast. The five stages of sexual maturity described below are based on the gonad development in female oysters.- Stage 1: Inactive/spent/resting
The gonad is completely shrunken and translucent. In some cases it is pale orange in colour. Large vacuolated yellow (fat) cells are seen in the interfollicular spaces. The sex at this stage can hardly be distinguished.
- Stage 2: Developing/maturing
The transparent nature of the resting gonad is lost and it becomes distinguished from other visceral masses. Gametogenic materials begin to appear in the gonad. As the stage advances, the gonad begins to branch along the posterior side of the retractor muscle and advances to the anterio-dorsal region. The gametes begin to proliferate along the follicle wall. In advanced stages, the inter-follicular spaces become reduced and the lumen of the follicle may contain some free oocytes. The majority of the oocytes are irregular in shape and the germinal vesicle (nucleus) is not distinctly seen. The average size of the oocytes is 60.0 × 47.5 μm and the germinal vesicle, if present, is 20.0 μm.
- Stage 3: Mature
The gonad spreads on to most of the visceral tissues. It is mostly yellowish cream. The lumen of the follicle is filled with free oocytes. Some of them are attached to the follicular wall by means of slender stalks. The majority of the oocytes are pyriform in shape. The average size of the oocyte is 68.0 x 50 μm with a well defined germinal vesicle. The mean diameter of the nucleus is 25 μm.
- Stage 4: Partially spawned
The gonads become loose in consistency and the visceral epithelium becomes dull. The follicles shrink with the reduction of gametes in the lumen. The oocytes are free and found along the follicular wall. Most of the oocytes are spherical and nucleated. The average size of the oocyte is 51.7 μm.
- Stage 5: Spent
The gonads shrink further with a few left over gametes in the lumen of the follicles. Ruptured follicles are seen in some cases and the lumen sometimes contains ruptured cells. Oocytes, if present are few and spherical. The average size of the oocytes is 54.4 μm. The description of the spent stages applies to the oysters which have recently undergone oogenesis. Otherwise they transform to the spent resting stage quickly.
Males show the same pattern of reproductive activity. However, in stages 2 and 3, the colour of the gonad is pale cream. In other stages of gametogenesis, the gonads of males and females appear similar when observed externally.Pinctada fucata from the Gulf of Mannar has two peak spawning seasons in a year: June-September and November-December, coinciding with the southwest and northeast monsoons, respectively. A slight rise in water temperature may be considered as the stimulating factor for the onset of the gametogenic cycle and a slight reduction in water temperature stimulates the oysters to spawn. However a few inactive, maturing and ripe gonads are present in almost all of the months of the year. Individual oysters spawn more than once in the same spawning season as the gonads are not emptied at one stretch.
4.2 Ecology
Pearl oysters are found from the low tide level to depths of about 75 m, therefore they can adapt and live in varying environmental conditions within this range. Environmental factors such as bottom topography, wind, waves, water movement, current, light, temperature, salinity, dissolved oxygen, pH, nutrient salts, and primary production play a crucial role in the settlement, growth and reproductive pattern of oysters, both in the natural beds and farms. In the Gulf of Mannar, the pearl oysters live on rocky or other hard substrata which lie roughly in a line parallel with and at a distance of 10–16 km from the coast. A rich fauna, comprising members of various groups like sponges, hydroids, polychaetes, lamellibranchs, amphipods, decapods, echinoderms, fishes etc. are usually associated with pearl oyster beds. The oysters obtained from the beds are successfully reared in shallow coastal waters with depths ranging from 4–8 m, where the sea does not become rough. In farming the pearl oysters, the preferred depth of culture is about 10 m where silting should be minimal. Unlike in Japan, the variation in temperature and salinity is not much pronounced in the Gulf of Mannar. The temperature of seawater in the natural beds varies from 27.0 °C (January) to 32.5 °C (May) whereas in the oyster farm at Tuticorin, it fluctuates between 24.0–32.5 °C. Similarly, salinity in the natural beds fluctuates between 27.4 ‰ and 35.90 ‰ with an annual range of 8.5 ‰. The salinity values in the oyster culture site at Veppalodai, ranged between 32.15 ‰ and 33.50 ‰ during 1974–76. An unusual dilution of seawater to 15.69 ‰ for short durations at the Veppalodai farm in November 1977 did not affect the oysters. If salinity level falls below 15 ‰, and if such condition is prolonged, it may lead to mortality. This may happen during unusual heavy rain and heavy discharge of fresh water from rivers in the vicinity. It is well known that the benthic ecology of the pearl culture grounds plays a vital role in the rate of production as well as quality of pearls. Rocky or gravelly bottoms are more suitable. A high amount of silt in the farm water may affect the filtration efficiency of pearl oysters. In Japan it has been observed that some culture grounds yielded pearls of good quality, while others did not. Some grounds yielded pink or white pearls while others produced only yellow and golden pearls. Repeated culture on the same ground sometimes affects the quality of pearls. Areas rich in phytoplankton which is consumed by oyster, are good but there should not be noxious blooms. A mild current of two knots per hour is necessary not only as a source of oxygen-rich seawater, but also to bring in fresh plankton as well as for the removal of metabolic products, and faecal matter. If the water current is strong, the formation of the nacreous layer is faster, but the quality of pearls is inferior. The rich nutrients discharged by the rivers into the sea increase the productivity of the water. The oysters can also directly remove the organic matter and calcium dissolved in the water. If oyster culture farms are located in places such as the vicinity of a river mouth, which is often exposed to prolonged dilution of seawater due to flooding, oyster growth will be affected.HATCHERY TECHNIQUES FOR SEED PRODUCTION
5.1 Artificially reared spat
Seed of P. fucata, were produced in 1981 in the laboratory through hatchery techniques at the Central Marine Fisheries Research Institute at Tuticorin. The technology developed is helpful in overcoming the problem of insufficient supply of mother oysters for cultured pearl production. The hatchery methods developed are simple to adopt and inexpensive. The suitability of the technology has been proved by producing seed during most of the year. The hatchery is one of the most important sources of sustained supply of pearl oysters.5.1.1 Hatchery building
The pearl oyster hatchery of the CMFRI at Tuticorin has facilities for oyster conditioning, maturation and spawning, as well as larval and spat rearing (Plate II A). The roof of the hatchery building is sufficiently high to avoid high temperature. Part of the roof of the wet laboratory has translucent fibreglass sheets to allow sufficient light for indoor phytoplankton culture. Glass panelled large windows and ventilators are provided for free passage of light and air. The concrete floor has sufficient gradient facilities for easy drainage.5.1.2 Seawater management
The seawater is usually drawn from the sea beyond the low water mark into a well through PVC pipes. The seawater is pumped to sedimentation tanks and passed onto the biological filter which contains coarse river sand at the top, pebbles below it and charcoal at the bottom. The filtered seawater is stored in a water sump and lifted to an overhead tank for supply to the hatchery. Periodic cleaning of the filter bed keeps the seawater uncontaminated. PVC, fibreglass and stainless steel materials are used in the hatchery. The seawater sterilized by ultraviolet irradiation is used only in specific cases.5.1.3 Aeration
Air compressors with storage tank are used to aerate seawater in the rearing tanks. The compressed air is passed through a series of filters to remove oil and moisture and is supplied to the various culture vessels through PVC pipes. Air is drawn at the required places from these pipes running the entire length of the hatchery through nozzles. The air is supplied to the tanks through diffuser stones.5.2 Live food production
5.2.1 Phytoplankton
Flagellates measuring less than 10 μm form the main food for pearl oyster larvae. Isochrysis galbana is an important algal food for the larvae. Other microalgal cells such as Pavlova, Chromulina and Dicrateria are also suitable for the larvae. The growth and spatfall timing varies with the different algal foods. Chromulina promotes faster growth while Dicrateria gives better spatfall.The flagellates are grown in 4-1 Haufkin flasks as stock culture and in 20-1 glass carbuoys and 100-1 perspex tanks in mass culture. Conway or Walne's medium is used for the culture of these flagellates. They enter the stationery phase of growth in about 15 days in Haufkin flasks and are maintained for two months without aeration. In mass culture, the maximum cell concentration is reached within 5–6 days. The composition of the medium used for mass culture as well as mixed algal culture is as follows:
| Potassium nitrate | : | 0.4 g |
| Potassium dihydrogen | ||
| Orthophosphate | : | 0.2 g |
| Sodium silicate | : | 0.2 g |
| Sodium EDTA | : | 0.2 g |
| Filtered seawater | : | 30.0 l |
5.3 Broodstock handling and spawning
5.3.1 Broodstock maintenance
Oyster broodstock are maintained at a water temperature ranging from 25–28 °C in a controlled room. They are fed with a mixed algal diet at a ration of 4 l per oyster/day. The algal food is supplemented by raw corn flour at 30 mg per oyster/day. Pearl oysters with maturing gonad fed with the above food for 45 days will spawn with a 30 % response. The matured oysters can be kept for a prolonged period at 25–28 °C, while spawning of these oysters can be stimulated by raising the water temperature by few degrees.5.3.2 Spawning
Spawning of natural oysters with mature gonads occurs when there is a simple change in the seawater environment or a mechanical shock by shell cleaning or a change in water pressure. In all cases males spawn first (Plate II B) and this induces the females to spawn within 30 minutes.In the absence of natural spawning the technique of induce spawning is employed. In this technique thermal stimulation is adopted predominantly by gradually increasing the water temperature by several degrees (from 28.5 °C to 35.0 °C). Spawning of pearl oysters can also be effected by chemical stimulation. Different concentrations (1.532, 3.064 and 6.128 millimolars) of hydrogen peroxide in combination either with normal seawater or alkaline seawater (pH 9.1) is used in inducing spawning. Different pH media (8.5, 9.0, 9.5 and 10.0) are prepared either using Tris buffer or Sodium hydroxide pellets (NaOH) and the pearl oysters are induced to spawn. A pH value of 9.0 in the case of Tris buffer and 9.5 in NaOH gives 78.6 % and 68.4 % of spawning, respectively. Injection of 0.2 ml of N/10 ammonium hydroxide (NH4OH) solution into the adductor muscle of the pearl oyster results in 48 % spawning.
5.3.3 Fertilization
When the eggs are released in the medium, they are pyriform in shape measuring 73.9 μm along the long axis and 45.2 μm in width. The yolk cytoplasm is heavily granulated and opaque. The egg is enclosed in a vitelline membrane and a large germinal vesicle is seen at the centre (Plate II C).Fertilization takes place externally in the water medium. Following fertilization, the pyriform eggs assume a spherical shape with the breakdown of the germinal vesicle (Plate II D). During fertilization the polar body appears and persists on the embryo up to blastula stage.
5.3.4 Early development and larval rearing
CleavageThe first cell division is seen 45 minutes after fertilization resulting in the formation of a micromere and a macromere. The polar body is placed at the cleavage furrow (Plate II E). During the second cleavage the micromere divides into two and the macromere divides unequally into a micromere and macromere. The stage with three micromeres and a macromere is called Trefoil stage. The macromere does not take part in further divisions. Micromeres divide repeatedly thus becoming smaller and smaller and passing through 8-cell, 16-cell, and so on until the morula stage (Plate II F). Each micromere develops a small cilium which helps in the movement of the embryo.

Blastula
The embryo is ball-like with transparent cells and a blastocoel. The embryos lift themselves in the water column and congregate at the surface. The floating embryos are siphoned out to clean containers and the residues at the bottom, containing broken tissues, undeveloped embroys, unfertilized eggs, sperm, etc. are discarded. Reorientation of cells starts and the blastocoel and blastopore are formed. The blastula stage is reached 5 hours after fertilization.
Gastrula
Gastrulation takes place by epiboly. The cells convolute and differentiate into different dermal layers. The archenteron is formed. The embryo is bean-shaped as there is convolution of cells. The gastrula exhibits negative photrophism. This stage is reached in 7 hours.
Trochophore larva
The minute cilia present in the gastrula stage disappear and the pre-oral and post-oral tufts of cilia develop, thus marking antero-posterior differentiation of the embryo. A single apical flagellum is developed at the anterior side. The anterior portion of the larva is broader while the posterior end is tapering like an inverted triangle. The movement of the larva is affected by the propulsive movement of the flagellum (Plate II G). The dorsal ectodermal cells secrete the embryonic shell, known as the prodissoconch I.
Veliger
A definite ‘D’ shape is obtained by the secretion of the prodissoconch I having a hinge line, mantle and rearrangement of the pre-oral tuft of cilia into a velum. The single flagellum, pre-oral and post-oral tufts of cilia disappear. The veliger larva measures 67.5 μm along the antero-posterior axis and 52.5 μm along the dorso-ventral axis (Plate II H). This stage is reached in 20 hours.


Umbo stage
Further development of the veliger to the umbo stage is gradual with the development of the shell, prodissoconch II. The typical clam shaped umbo stage is reached between 10–12 days and it measures 135 × 130 μm (Plate III A). The shell valves are equal and the mantle folds are prominent.
Eye spot stage
After attaining the full umbo stage, the larvae develop an eye spot at the base of the foot primordium. A well developed velum effects the movement of the larvae. The ctenidial ridges develop at this stage. The minimum size at which the larva develops the eye spot is 180 x 170 μm (Plate III B) usually in 15 days.
Pediveliger stage
The foot is developed on the 18th day when the larvae measures 200 × 190 μm. The transitional stage from the swimming to the crawling phase has both velum and foot (Plate III C). Later the foot becomes functional while the velum disappears. Gill filaments are now visible (Plate III D).
Plantigrade
When the pediveliger larva selects a substratum for settlement, additional shell growth is seen along the globular shell margin except at the vertex of the umbo region, in the form of a very thin, transparent, uniform conchiolin film. In the meantime the byssal gland secretes byssal threads for attachment. Labial palps and gill filaments develop. The stage is reached in 20 days at the size of 220 × 200 μm (Plate III E).
Spat
By the repeated addition of dissoconch, the plantigrade transforms into a spat. It resembles an adult with the hinge line, anterior and posterior auricles and the byssal notch (Plate III F). The left valve is slightly more convex than the right one. The spat attaches itself to the substratum with the aid of the byssal threads. A healthy spat measures 300 μm in 24 days. The sizes and days given for the different larval and post-larval stages vary from batch to batch according to the environmental conditions.


5.4 Larvae and spat handling
5.4.1 Larval rearing conditions
Larval density plays a significant role in the growth of pearl oyster larvae. Under identical conditions the larvae show differential growth rate at different larval densities. At higher densities the growth and spatfall are poor. A culture density of two larvae per ml produces optimum growth and spatfall rates.The colour of the culture tanks also influences the setting of larvae. Spatfall is much higher in FRP black tanks than white and blue tanks.
Aeration during larval rearing affects growth and spatfall. The effect of aeration is more pronounced in smaller volumes of water. However, aeration is required after the setting of the pearl oyster larvae.
5.4.2 Spat production
Spat production is carried out in the molluscan hatchery at Tuticorin throughout the entire year. However, during May-August the spatfall is less due to high salinity, dustfall and warm landward wind. Sudden spurt of ciliates in the culture medium is common during this period. Such problems can be overcome by good management.5.4.3 Feeding
The microalgal cell Isochrysis galbana is provided to the larva from the veliger stage onwards. The optimum ration for a larvae is 5,000 cells/day up to umbo stage. The dose is doubled from the umbo to the pediveliger stage and tripled afterwards up to settlement. For about 15 days after settlement each spat is fed with I. galbana at 50,000 cells/day. Mixed algal diet containing mostly Chaetoceros and I. galbana is given in a ratio of 1:1 in the following 15 days. Later the spat is supplied with a mixed algal diet.5.4.4 Transplantation
The spat are reared in the hatchery for about two months. By then they shall have grown to 3 mm or more. They are then transferred to the farm in velon screen netcages with a mesh size of 400 μm. Mortality may occur if spat measuring less than 3 mm are transplanted. Spat growth is monitored carefully and the netcages are changed whenever necessary. The size of mesh of the rearing cages is also monitored. The oyster spat attain an average size of 40–45 mm in 12 months.5.4.5 Survival
In the hatchery about 20 % production of spat is achieved in tanks of 500-1 capacity and 40–50 % production in 50-1 tanks. The survival of transplanted spat in the farm is about 30 % at the end of one year.PEARL OYSTER FARMING
6.1 Selection of culture sites
In any farming activity, culture site selection is of paramount importance. Technological and economic considerations play a major role in the selection process. A careful appraisal of the habits of the organism to be cultured would give a resonable level of confidence on the tolerance limits within which the various environmental parameters can vary. Due consideration has to be given to possible effects of fluctuating water flow, primary production, siltation, etc. in order to obtain the optimum level of growth and production of high quality pearls. Unsuitable levels of environmental factors such as salinity, water temperature, cold water currents and other factors such as red tides, hydrogen sulphide and pollution by industrial and domestic effluents are serious hazards to pearl culture.Sheltered bays are ideal locations for pearl oyster farms. They offer good protection to the culture structures such as rafts and cages. Shallow coastal waters where the sea is calm most of the year can also be considered as a suitable site.
6.2 Environmental conditions
6.2.1 Temperature
In temperate regions, the water temperature plays an important role in the biological activities of pearl oysters. In Japan, the optimum temperature for oyster growth has been found to be between 20–25 °C. A temperature below 13 °C causes hybernation. Below 6 °C, the oysters die. At temperatures above 28 °C, the oysters show exhaustion. The thickness of the pearl layers are affected by the minute changes in water temperature during the day and also vary considerably according to the season of the year. The deposition of calcium stops at a water temperature of 13 °C. In the Gulf of Kutch, the oysters grow vigorously in winter months when the seawater temperature ranges between 23–27 °C. A slight decrease in temperature triggers spawning in oysters in the Gulf of Mannar. The growth-temperature relationship is presumably valid only up to a certain temperature for optimum growth.6.2.2 Salinity
Pearl oysters tolerate a wide range of salinity from 24–50 ‰ for a short duration of 2–3 days. Salinities of 14 ‰ and 55 ‰ may cause a 100 % mortality among the oysters. The effect of salinity on the growth of pearl oyster has not been clearly investigated. However, it appears that pearl oysters tend to prefer high salinities. Oysters raised in such salinities produce pearls with a golden tint.6.2.3 Bottom
Gravelly bottoms are suitable for pearl oyster farming, while sandy or muddy bottoms should be avoided. Oyster growth is affected by water temperature and nutritional condition of the ground. Repeated culture on the same ground leads to some extent the deterioration of pearl quality. The chemical and physical state of the sea bottom is affected by the organic substances discharged from the oysters and fouling organisms. Periodic removal of such accumulated substances from the bottom of the culture grounds often increase production as well as quality.6.2.4 Depth
The optimum depth for farming pearl oysters is around 15 m. At greater depths, even if the rate of nacre deposition is slower, pearls of high quality with a pinkish colouration are obtained.6.2.5 Silt load
Pearl oysters generally prefer clear waters as high turbidity levels will affect their filtration efficiency. A decline in oyster condition was noted at Veppalodai farm due to the high silt content in the farm area throughout most of the year.6.2.6 Water current
Culture sites should be naturally sheltered against strong winds and waves. Tidal amplitude and currents must be sufficient in order to allow replenishment of oxygenated water and fresh plankton and flush away waste materials. In strong water currents the formation of the pearl layers is usually fast, but the quality of pearls produced is affected.6.2.7 Primary productivity
The condition of a specific culture ground depends primarily on the chemical constitution of the seawater and on the species and amount of plankton present. Rich nutrients discharged by rivers into the sea are responsible for high primary productivity. The oysters probably derive their chief source of conchiolin from the nitrogen substance of the plankton. The organic matter and calcium dissolved in the seawater are directly absorbed by the food consumption cells. The calcium passes through the mantle to be deposited on the surface of the shell or pearl in the process of their formation. The presence of trace metals in small quantities influences the colour of the nacre.6.3 Supply of oysters
In pearl oyster farming, oysters collected from the natural beds or reared from naturally collected or cultured spat are used. In the Gulf of Mannar, several pearl banks are distributed off Tuticorn at a distance of 12–15 km and at depths of 12–25 m. Pearl oysters from these beds are collected by skin and SCUBA diving (Plate IV A). Wide fluctuations in terms of pearl oysters availability have been noted in different pearl banks in this area during the last few centuries as also during the most recent years. In the Gulf of Kutch, the pearl oysters are found on the intertidal flats and the population is sparse. Collection is done by hand.In Japan, oyster spat are collected by submerging bundles of cedar twigs near the water surface during the peak larval settlement season. Hyzez films and old fish nets are also commonly used as spat collectors. Almost the entire requirement of oyster supply to the pearl culture industry is met by this type of spat collection. Spat collection attempts in India have not been successful, and this may be due to the distance of the pearl oyster beds from coastal waters.
However, India has recently succeeded in producing pearl oyster seed under hatchery conditions, therby providing the industry with a more dependable source of oysters.
6.4 Rearing methods
6.4.1 Raft culture
Raft culture is considered to be one of the most suitable farming methods in sheltered bays. The size of the rafts can be altered according to the convenience of the situation. A raft of 6×5 m in size can be easily constructed and floated with 4 buoys. Rafts are usually constructed with logs of teak, venteak or casuarina wood, of chosen length with the bottom of about 10 cm diameter tapering to 6 cm diameter at the tip. These logs are arranged as per the requirement and lashed with coir ropes. Floats are attached to the raft to give buoyancy. The floats can be sealed empty diesel drums of 200 l capacity with fibreglass coating, mild steel barrels painted with antisaline/anticorrosive paints or FRP styrofoam floats (Plate IV B and C). Unit raft system is found to be convenient and well suited to the Indian sea conditions. Rafts are moored with anchors at opposite sides with tested quality chains and their direction is decided according to the prevalent wind direction at the specific site (Fig. 4 A-C).In the long-line culture method, spherical or cylindrical floats which are connected by horizontal synthetic rope or chain are used (Plate IV D; Fig. 4 D). The oyster cages are suspended from the ropes. This system is good for open sea conditions. In another method of hanging, a hole is drilled near the hinge of the pearl oyster. A small thread is put through the hole, which is then tied to a straw rope coated with tar. The straw ropes are hung from a raft.
6.4.2 On-bottom culture
Sea bottoms with a granite or coral stones composition can be used for on-bottom culture. In the Tuticorin Harbour Basin where the breakwater has been constructed with granite stones, the protected portion of the breakwater is used for culturing mother oysters. 1 m of water is available below the low water mark. Due to constant circulation of seawater, settlement of fouling organisms is poor and inconsistent. However, it has been noted that the growth of the mother oyster is slower in on-bottom culture compared to the growth of oysters cultured in raft.6.5 Rearing containers
6.5.1 Culture of mother oysters
Box cages, measuring 40×40×15 cm, are used to rear mother pearl oysters. The size of the mesh varies with the size of the oysters to be reared. The frames of the cages are made up of 6 mm mild steel rods, coated with anticorrosive paints or coal tar. Box-cages are useful in general mother oyster culture (Plate V A).To trace the history and performance of individual oysters, frame nets are used. The frames, measuring 60×40 cm each with five compartments, meshed and hinged at one end, open as a book. The oysters are arranged in rows and held in the compartments when closed. The space available in between the two frames is about 10 mm which is sufficient for the oysters to open their valves for feeding and respiration (Plate V B).


6.5.2 Juvenile rearing
Juvenile pearl oysters are reared in netcages (Plate V C-D). Synthetic fabric of velon screen bags whose sides are stretched with a steel rod in the form of a prism are used for rearing of juveniles. The mesh size of the screen depends on the size of juveniles to be reared. The mouth of the bag is tied with a synthetic twine which facilitates opening or closing when required. To provide further protection from predators the bags are placed in old nylon fish net bags. Clogging by silt and by the growth of fouling organisms can be prevented by periodical replacement of the velon screen bag which can be cleaned, sun-dried and reused. Spat of up to 2 cm in size are reared in these small netcages. Box-cages which are used for rearing mother oysters can also be used for juvenile rearing by providing an additional velon screen cover inside the cage.

BIOFOULING AND PREDATION
Major problems in pearl oysters farming are caused by biofouling organisms which settle and grow on the oyster shells, by boring organisms which riddle through the shells making them weak and friable, and by predators which feed on the oysters. Singly or in combination, these organisms can cause heavy mortality to the farm stock through physiological stress and diseases. The removal of foulers, borers and predators is a labour intensive activity. The seasonal variations of the dominant fouling organisms and predators have to be carefully investigated, and suitable techniques for their control should be adopted on a periodical basis.7.1 Biofouling organisms
7.1.1 Barnacles
The cirriped Balanus amphitrite variegatus is one of the major fouling organism. Two peaks of heavy settlement of these organism, particularly in the culture sites, have been recorded in India: one from mid-June to August and the other from September to November. In the farm at Veppalodai a minimum of 2,500 barnacles (July) to a maximum of 3,460 barnacles (June) have been recorded on an area of 25 square cm during the first peak, while 1,290 (September) to 2,700 (November) in the second peak. The settlement was considerably less from January to May. Heavy settlement of barnacles cause physical obstruction to the opening and closing of the oyster valves. When the barnacles were dense they completely cover the entire surface of shell valves (Plate VI A and B). In addition to this, during the removal of barnacles, the shell margins were also damaged resulting in the recession of shell growth.7.1.2 Ascidians
Ascidia depressiuscula, Dicarpa sp., compound ascidians belonging to the genus Diplosoma and, species of Botrilloides have been recorded throughout the year. Ascidians are particularly found in large numbers during the period from October to December.
7.1.3 Bryozoans
Species of Membranipora, Thalamoporella and Lagenipora represent the group almost throughout the year. The peak period of occurrence is usually between November and December. Other species, such as Watersipora and Bugula are more commonly found during February and June.7.1.4 Molluscs
Among the fouling molluscs, Avicula vexillum and spat of Crassostrea sp. are numerous on the farm during April to June. The spatfall of Avicula vexillum can be so numerous in the rearing cages, that the pearl oyster spat cannot be easily separated without causing damage to or killing the spat. Modiolus metcalfei is another common fouling mollusc, usually occurring in July. The spatfall of Pinctada sp. has been recorded in the farm during May-July and November-January. The settlement of these organisms can significantly affect the culture of the mother oysters as well as the production of the cultured pearls.7.1.5 Sponges
The profuse growth of sponges such as Callyspongia fibrosa and Haliclona exigua may result in the complete covering of an individual oyster or a cluster of oysters. The occurrence frequency of these sponges is usually low at the present Indian farm site and the damage caused to the oysters is negligible.7.1.6 Other organisms
Besides the above mentioned groups, the fouling community may be composed of a large number of other organisms such as amphipods, hydroids and algae typically occurring in June, October and December. Major hydroids belong to genera such as Campanularia, Sertularia, Abeitinaria, Lytocarpus, Diphasia and Thuiaria. Commonly occurring algae are Gracilaria, Codium, Boergesenia and Ceramium. Other organisms such as anthozoans, juveniles of Panulirus sp., crabs, tubicolous polychaetes, Pycnogonids, polyclad worms, crinoids, alcyonarians, opisthobranchs, blennid fishes and Pinna spat may occur on the oysters and rearing facilities in certain months of the year.7.2 Boring organisms
Boring organisms comprising polychaetes, sponges, molluscs and isopods may cause considerable damage to the pearl oyster shell.Polychaetes belonging to the families Sillinidae, Nereidae, Spionidae, Terebellidae and Cerratulidae have been found to bore pearl oyster shells. Among them the spionids Polydora ciliata and P. flava and the cirratulid Cirratulus cirratus are the most common borers. Polydora spp. typically caused simple and compound blisters on the inner side of the oyster shells. In a few cases, the blisters erupted as tumour-like protrusions, mostly near the adductor impression. Blister formation by boring polychaetes in oysters of 40 mm in length and less is usually less than in large oyster specimens. The cirratulid Cirratulus cirratus is found in furrows between the layers of periostracum of the pearl oyster shell. As a result, the furrow eventually becomes deeper and wider causing the peeling of the periostracal layer thus weakening the shell.
Major boring sponges are Cliona celata, C. vastifica and C. margaritifera. In several Indian farms over 20 % of the oysters have been found to be infected by such sponge. These borers initially attach themselves near the umbo region of the shell and later spread over the surface of the two valves. Oysters affected by these sponges have to secrete more nacre in order to seal off the perforations. With heavy infestation the oyster shell usually becomes extremely fragile and susceptible to further infestation and damage (Plate VI C).
The pholadid bivalve Martesia sp., the mytilid Lithophaga sp. and, the isopod Sphaeroma sp. are occasionally found in the culture farms. Martesia sp. has been found to make a significant number of holes on the oyster shells.
7.3 Predator organisms
Besides fouling and boring, predation is another menace encountered in pearl culture farms as well as in natural pearl oyster beds. Predators in wild beds are mainly benthic fish which feed on young oysters below one year of age, while rays, octopods and starfish feed on adult oysters. Recently, Cymatium cingulatum (Plate VI D) and Murex virgeneus have been found to be serious predators in natural oyster beds. A study on the feeding rate of Cymatium cingulatum in the laboratory showed that 20 oysters were consumed by two Cymatium 26.0 mm in size within a period of 37 days; 20 oysters in 20 days by two Cymatium of 40.5 mm and 20 oysters in 19 days by two Cymatium of 61.8 mm. Two specimens of M. virgeneus, 54.0 mm in size consumed 20 oysters in 49 days in a laboratory experiment. These gastropods have been shown to survive starvation for 57 to 125 days.Usually in the culture sites crabs are the worst predators. These crustaceans enter the spat rearing cages during their larval phase and, as they grow, they crush and feed on the pearl oyster spat. Charybdis lucifera, Atergatis integerrisimus, Leptodius exaratus, Neptunus spp. and Thalamita spp. are some of the crabs commonly found inside the pearl oyster cages in the Indian oyster farms.

Three species of parasitic trematodes have been isolated from the foot, mantle, gill, liver and gonads of pearl oysters. Their monthly percentage of infection has been recorded to vary from 3–20 % in a single farm site.
7.4 Control measures
7.4.1 Fouling
The most effective method of controlling fouling growth is by cleaning the oysters, cages and farm materials regularly. Suspending the oyster cages at depths below 5 m during the peak barnacle settlement period usually reduces the degree of settlement of this organism. In addition, periodical exposure of the oysters to sun light for a few hours results in the killing of the larvae of most undesirable settlers. Fresh water, brine and chemical treatment are also found to be effective. Finally, the peak spawning and settlement season of major fouling organisms can be also avoided by timing the introduction of the new spat stocks in the farms.7.4.2 Boring
The boring polychaetes are easily killed by immersing the oysters in freshwater for about 6 hours. The oyster shell valves infested with boring organisms can also be brushed with 1 % formalin, dipped in freshwater and returned to the sea. The above treatment is found to be effective against sponges and Martesia sp. and partly against Polydora sp.. At a concentration of 78 %, brine has been shown to kill all polychaete species within 8 hours.7.4.3 Predation
Periodic monitoring of the culture facilities and manual removal of the predators is the only way of containing predation on the oysters. Oyster spat can be additionally protected from fish by covering the rearing cages with old fish net.CULTURE SYSTEM
8.1 Culture operations
Pearl culture in Japan is carried out mostly by small cooperatives or family enterprises, while only a few large-scale operations exist. In the peak period of production (1966), there were 4,710 co-operatives half of which were operating 1–14 rafts, one fifth operating 15–29 rafts, 12.0 %, 30–49 rafts and the rest more than 50 rafts. The total number of co-operatives came down to about 2,500 in 1973. This shows that small-scale operations are the mainstay in pearl culture. The Japanese pearl culturist has the advantage of being able to buy the mother oysters for his farm from those who are solely engaged in seed collection and mother oyster culture. In India also such small-scale operations at family level is possible if the production of oyster seed is done by hatcheries and supplied to the pearl culturist.The activities, major inventory and manpower of a pearl culture establishment is summarised briefly to provide an overview for an easy understanding of the nature of this industry. Major work is in the sea involving pearl oyster collection and farming. Manpower needs and inventory items vary according to the scale of the operation.
A) Raw material: Pearl oyster (Pinctada fucata)
Oysters from natural beds
- Activity: Seasonal survey of beds and collection by diving.
- Inventory: Boats; self-contained underwater breathing apparatus (SCUBA) and diving accessories such as fins, masks, snorkel, depth-gauge, knife, belt; compressed air units (main and portable compressors); collection kit and oyster bins.
- Manpower: Boat crew, navigator, divers, diving assistants.
Oysters cultured from wild spat
- Activity: Collection of pearl oyster spat by suspending spat collectors from rafts at suitable sites.
- Inventory: Rafts, lighted buoys, anchors, chain and spat collectors.
- Manpower: Same as above and farm labour.
Oysters cultured from hatchery spat
- Activity: Induced spawning, larval rearing, culture of larval food, spat production, transplantation.
- Inventory: Hatchery building, A/C larval food production room, glass carbuoys, FRP tanks 50 l and 1 ton capacity, chemicals, U.V. sterilizing unit, seawater flow-through system, glassware, plasticware.
- Manpower: Biologist, laboratory technicians, technical assistants.
B) Pearl oyster farm
- Activity: Juvenile rearing, mother oyster culture, post-operation care, farm maintenance and farm stock maintenance.
- Inventory: Log rafts, long lines, lighted buoys, floats, anchors, chain rope, juvenile rearing cages, cages, frame nets, dinghy, out-board motor, floating sheds and miscellaneous tools.
- Manpower: Farm superintendent, technical assistants, farm labour.
C) On-shore establishment
Surgical unit
- Activity: Pearl oyster surgery and convalescence.
- Inventory: Surgical tools and accessories, furniture, shell bead nuclei of different sizes, chemicals, glassware, plasticware, ultraviolet lamps and raceway.
- Manpower: Chief technician and technicians.
Farm house
- Activity: Shore support for maintenance of farm and farm stock.
- Inventory: Oyster cleaning tools, farm structure maintenance requirements (repairs and maintenance of raft, long line, floats, anchors, chain, cages, etc.) and oyster tanks.
- Manpower: Same as for pearl oyster farm and on-shore establishment.
D) Pearl collection centre
- Activity: Collection of cultured pearls and incidental natural pearls.
- Inventory: Plasticware, chemicals, oyster knife, vats.
- Manpower: Technical assistant
E) Pearl processing centre
- Activity: Cleaning, sorting and grading of pearls; treatment of pearls for removal of minor blemishes; bleaching, dyeing, and colour improvements.
- Inventory: Sorting trays, miscellaneous tools, chemicals and glassware.
- Manpower: Pearl processing expert and technical assistant.
F) General services
Seawater supply
- Activity: Supply of quality filtered seawater to pearl oyster hatchery and surgery, raceway, flow-through system and other tanks, sterilized water for larval food production and larval rearing.
- Inventory: Pump house, filter bed, sump, over-head tank, supply channel with regulators.
- Manpower: Electrical supervisor and assistant.
Air supply
- Activity: To supply oil-free air to hatchery, larval food production laboratory, and pearl oyster surgical room.
- Inventory: Air blowers with air supply tubes and regulators.
- Manpower: Same as above.
Power and fresh water supply
G) Laboratory
- Activity: Monitoring of oyster health and condition; maturity, seawater analysis, bacterial analysis of seawater; advice to farm superintendent and chief technician; feed-back to research system.
- Inventory: General biological laboratory equipment and analytical equipment for seawater analysis.
- Manpower: Biologist, chemist, laboratory technicians.
H) By-product unit
- Activity: Conversion of by-products of pearl culture to value-added items.
- Inventory: If the unit is self-contained, all items required for utilization of shell and meat; otherwise, collection, preservation and storage of materials, unit sale to outside agencies.
- Manpower: Specific manpower to handle by-products processing work, if self-contained, otherwise linked to other items.
I) Management and administration
- Activity: Planning, execution and administration of project.
- Manpower: General manager, administration, accountants and stores staff.
THE MANTLE
9.1 Mantle structure
The mantle, which is an important part of the molluscan body, is responsible for the secretion of the shell. In the pearl oyster the mantle is bilobed, each consisting of three regions: the marginal, pallial and central mantle (Fig. 5). The free edge of the marginal mantle is thick, pigmented and fringed with branched tentacles. Along the hinge line, the marginal mantles of the two lobes fuse to form the mantle isthmus. The pallial mantle is attached to the shell, a little away from the shell margin, while the central mantle is dorsal to the pallial mantle.9.1.1 Marginal mantle
The marginal mantle consists of three folds: the inner, middle and outer fold. Even though the mantle folds look similar morphologically, functionally they are quite different. The inner fold is muscular in activity, the middle sensory, and the outer (shell) fold is secretory in function.Inner fold
The inner fold is relatively large compared to the other two folds. The fold is lined with ciliated columnar epithelium cells 5–50 μm thick, which have a distinct basal nucleus. The margin of the fold shows a conspicuous pigmentation. Longitudinal and transverse muscle cells, which are also pigmented, are found below the epithelial layer.
Middle fold
The inner margin of the middle fold is similar to the inner margin of the inner fold. The outer margin of the middle fold has ciliated cells, 45 μm in size, columnar in shape, and also with a distinct pigmentation.
Outer (shell) fold
Close to the shell margin is the outer mantle fold. The outer surface of the fold is lined with specialized cells, which are not ciliated or pigmented. Elongated (15–30 μm) stratified columnar epithelial cells occur near the periostracal groove on the inner surface of the fold. Further towards the tip, these cells become smaller in size (10–20 um). However, the arrangement of the columnar epithelial cells, throughout the inner surface from the groove to the tip of the mantle fold, is similar in nature.

9.1.2 Mantle isthmus
The dorsal marginal mantle or the mantle isthmus consists of non-ciliated columnar epithelial cells. Sub-epithelial or epithelial secretory cells are totally absent in this region.9.1.3 Pallial mantle
The portion of the mantle just dorsal to the marginal mantle is known as the pallial mantle. Here, the outer epithelium cells are non-ciliated and smaller (20–30 μm) than those of the ciliated inner epithelium, and are highly vacuolated. Secretory cells are found in both the epithelium, and the sub-epithelium layer.9.1.4 Central mantle
Below the shell and dorsal to the pallial mantle is the central mantle, which covers the body of the animal. The outer surface of the central mantle is lined with small columnar epithelial cells (10–15 um). Histologically, the secretory cells of the inner epithelium of the central mantle look similar to those of the epithelial cells of the inner pallial mantle.THE SURGERY
The two items needed to induce the formation of a cultured pearl are a piece of mantle and a nucleus. The mantle piece, taken from a donor oyster, is grafted into the gonad of the recipient oyster, along with a spherical shell bead nucleus. The different steps followed in the operation are: (1) selection of oysters, (2) preparation of graft tissue, (3) conditioning of oysters, (4) pearl oyster surgery and (5) post-operation care.10.1 Surgical instruments
A set of specially made surgical tools is used in the surgery (Plate VII). These instruments can be made to specification by any surgical instrument manufacturing company.Knife
The knife has a blade 9 cm long and a wooden handle 11 cm long. The width of the blade is 1.2 cm at the base and 1.5 cm near the tip. The anterior portion of the blade is slightly curved corresponding to the curve of the oyster shell, so that the blade can be easily inserted between the two shells in closed condition. The blade is made by hand forging and finished by filing and grinding. The knife is used to open the unconditioned oysters by sharply cutting the adductor muscle without touching the mantle lobes.
Scissors
This is a pair of straight surgical scissors of 10 cm length. It is used for cutting a long and narrow strip of mantle from its edge. The cutting edges are sharp and the tips are finely ground so as to enable quick cutting of a strip before the mantle withdraws under the stimulus of contact.
Forceps
The forceps is usually 14 cm long. The two components are filed and ground and are provided with serrations and finely ground points at the tips. The material near the joint is ground to proper size to get required mild tension after due hardness is imparted. It is used to lift the mantle strip from the shell, to hold it while cleaning and trimming and to reverse the strip on the wooden block.

Spatula
The spatula is 17.5 cm long, with a round handle of 13 cm length and 4 mm diameter and a blade 4.5 cm in length and 8 cm in width. The required springiness is given to the blade by grinding and the edges are smoothened out. The spatula is used to remove dirt on the mantle strip and to smoothen the folds on it. It is also used to gently lift back the mantle, labial palps and gills of the oyster during surgery so that the foot and the main body are exposed.
Scalpel
The scalpel is flat and 17 cm long, the length of the blade portion being 3.5 cm. The scalpel is produced by forging from bar stock or blanked from sheet metal and the actual size and shape are obtained by filing and grinding. The instrument is then heat treated to get high hardness. The 2 cm broad cutting edge provided at the end has a delicate curve and is smooth and sharp. The scalpel is used for trimming the mantle strip on both edges, to remove unwanted tissue and to sharply cut the tissue into small bits of the required size. It is also used in place of scissors to cut strips from the mantle.
The second group of tools used in the actual operation are designed for the pearl culture industry operators. They are described below:
Oyster stand
The stand is used to hold the oyster in a stable position, so that the operator's hands are free to perform the surgery. It consists of two parts, the base and the clamp. The base consists of a wooden board, to which is screwed a metal square plate, 4.5 cm wide. A vertical tube of 15 cm in length and 1 cm inner diameter is welded to the basal plate. The tube has a collar at the top provided with a threaded hole for fixing a bolt to hold the shaft of the clamp tightly in position.
The clamp consists of two plates, the head-plate and a movable jaw. The head-plate is mounted on an adjustable tilting head supported by a shaft. The movable jaw is held against the head-plate by a spring. The front edges of the two plates form short, slightly curved lugs, which tend to follow the curve of the oyster shell and prevent lateral movement of the oyster. To the head-plate is fixed a curved rod, which passes through a hole in the shaft. A threaded hole and bolt are provided at this point to fix the rod in position. The plate assembly can be tilted from a vertical to a horizontal position according to the convenience of the operator. For fixing the oyster, the movable jaw is opened by applying finger pressure at the bottom of the plate and after the oyster is placed in position the pressure is released. The jaw holds the oyster firmly against the head-plate. The head-plate has a breadth of 5.3 cm and a height of 7.0 cm. The movable jaw is 5.5 cm broad and 8.5 cm high. The shaft is 11.5 cm long and its diameter is slightly less than 1 cm. The components are individually made to size and shape and are heat treated to sufficient hardness. They are then assembled to form the oyster stand.
Shell speculum
The shell speculum is used to keep the oyster open for the duration of the operation. The instrument is 14.5 cm long and consists of two components, which are made by forging from round bar stock to proper size and shape. Each component has a long straight portion and an arc. The two arms are fitted together by a male-female joint at about 5 cm from the tip. The top of the straight portion is flat and rectangular with rounded corners. The spring between the two arcs keeps the instrument in a closed position normally. A metal collar, which is provided around the straight arms, helps regulate the distance between the flat ends as desired. A maximum opening of 1.5 cm is obtained between the flat ends with the collar pushed to the bottom. This is about the distance between the two valves of the operable size oyster when the adductor muscle is in a fully relaxed condition under narcotisation. When the oyster partially opens its shells, the flat end of the speculum is inserted between the two valves. By gently closing the two arcs, the flat ends open and along with them also the shell valves. When the desired gap is obtained, the collar is slipped down to maintain the gap. The maximum possible opening between the shell valves differs from oyster to oyster.
Retractor
It is a slender, flat rod 15 cm in length, provided with a sharp bent hook at the tapered end. The retractor is used to hold the foot of the oyster in a stretched position during the operation.
Lancet-cum-graft lifting needles
There are three such needles. Each needle consists of an elongated spindle-shaped aluminium handle in the middle (6.5 cm long), with a lancet and a graft lifter, each 5.5 cm long, at the two ends. The lancet is a thin (2 mm) stainless steel tapered shank with its tip slightly curved and flattened to form an elliptical blade. The edge of the blade is rendered smooth and sharp. The graft lifter is similar to the lancet, but the tip is provided with a sharp, pointed spur. The lancet is used to make a sharp incision at the base of the oyster foot and to cut a channel through the tissues of the gonad up to the site chosen for nucleus implantation. The spurred tip of the needle is used to pick out the small graft tissue from the wooden block and to insert it into the site of implantation through the channel. The sizes of the cutting blade of the lancet and the spur are a graded series according to the size of the graft tissue to be lifted. The lancets and graft lifters are made to the desired shape and size by hand forging and finished by filing and grinding with abrasive wheels. They are polished to the required extent and fitted to the handle.
Nucleus-lifting needles
These are similar in construction to the needles described above, but are provided with hemispherical cups at both ends of the shanks. There are three such needles, each with two cups at the ends. The cups are of different dimensions to enable lifting of nuclei (spherical shell beads) of 2–8 mm diameter range. The cup shoe is initially drawn by hand forging and finished to dimensions by pressing with iron balls of proper size in the cold condition. Then the hemispherical cup is cut to the required size of slightly less than the diameter of the sphere and imparted a vacuum finish. The cup is moistened by dipping in seawater and made to touch the dry surface of the nucleus which immediately adheres to it. The cup end is inserted into the channel through the incision cut on the body of the oyster and the nucleus is placed in contact with the tissue graft. While withdrawing the needle, the nucleus is made to drop from the cup by a slight turn of the needle.
10.2 Nucleus
Spherical shell beads are used as nuclei to produce round pearls. These beads are prepared out of thick shells of other molluscs, usually freshwater mussels. These shells are imported into Japan from USA, where the freshwater mussels, popularly called pig-toe shell (Tritogonia), three-ridge shell (Pleurobema) and washboard shell (Megalonais), themselves known to produce pearls, occur in the tributaries of the Tennessee River. Alternatively, locally available thick molluscan shells which have a composition akin to pearl oyster, as for example the shell of the chank Xancus pyrum, can be used after studying the specific gravity of the material and other characteristics. Molluscan shell material is preferred due to phylogenic affinity, chemical composition, binding strength and heat resistance properties which are similar to those of the nacre. The shells are processed into spherical beads of different diameters, generally 2–7 mm for Pinctada fucata, through cutting, grinding, shaping and polishing using appropriate machines and tools. Dimensional accuracy, smooth finish and high polish are important factors. The beads should be cleaned and dried before use.10.3 Selection of oysters
The factors to be considered in the selection of oysters are their weight, reproductive stage of development and overall health. A weight of 25 g or more is the ideal size for implantation, while 20 g oysters can be considered for implantation of smaller size nuclei, i.e. 2–3 mm in diameter. Fully matured oysters are not suitable, since during surgery the gametes tend to flow out and block the visibility of the implantation site so that proper orientation of the mantle piece and nucleus cannot be ensured. Therefore, oysters in the immediate post-spawning recovery phase or those in the early phase of gametogenesis should only be selected. This factor in turn decides the annual surgery period. In addition, the oyster should not suffer from polychaete blisters, sponge borings and trematode infection. The selected oysters should be cleaned and all the fouling organisms carefully removed.10.4 Graft tissue preparation
The donor oysters do not have to be subjected to any conditioning process, which the recipient oysters have to undergo. Small pieces of the pallial mantle taken from the donor oysters are used as grafts for implantation (Fig. 6).The donor oyster is cut open as follows:
- Hold the oyster dorsal side down and the posterior end facing the technician.
- Insert the curved end of oyster knife between the two valves at the posterior side.
- Push the knife straight through the oyster until the knife tip reaches the anterior end.
- Press the knife straight downwards to cut through the adductor muscle.
- Separate the two valves by tearing the hinge, without disturbing the two mantle lobes. If disturbed, the lobes will shrink and cannot be used.
The steps involved in the removal of the mantle (marginal and pallial region) are given below:
- Deal with one valve, with the adhering body tissue, at a time.
- Expose the mantle lobes by gently brushing aside the gills with the tip of spatula. Care should be taken for the mantle not to shrink.
- With the aid of the knife, starting from the posterior margin, cut the mantle tracing a curve up to the anterior margin (Fig. 6 A).
- Using the forceps, lift the mantle gently and place the tissue on a soft, clean, moist wooden block without changing the side. At this stage the inner epithelium of the mantle is facing the technician.
Further steps in the preparation of graft tissues are as follows:
- Gently stretch the tissue end to end.
- With a wet sponge, gently wipe out all the mucus and dirt.
- Use the graft knife to cut away the marginal mantle (this mantle is characterized by numerous folds and it is highly pigmented).
- In the same manner cut away the inner muscular portion of the mantle on the opposite side.
- Again wipe the mucus and dirt with a wet sponge.
- Holding one end, lift the mantle ribbon, reverse the side (top to bottom) and place it on the block. Now the outer epithelium is facing the technician.
- Wipe the mucus and dirt softly without causing damage to the outer epithelial layer.
- Trim the margins on either side until a mantle ribbon of about 3 mm width is obtained (Fig 6 B and C).
- Remove all the dirt and mucus from the wooden block. If necessary, transfer the mantle ribbon to a new block without changing sides.
- Use the graft knife to cut the ribbon into small pieces (2–3 mm). The size of each piece has to be in proportion to the size of the nucleus (Fig 6 D).
- With the use of a soft brush smear the mantle pieces with a highly diluted solution of water-soluble eosin.
- Keep the tissues moist until they are used within about 30 minutes.
Precautions
- Care should be taken to ensure that the knife does not injure the palm of the technician while inserting it between the valves of the oyster.
- Use only clean, sterilised, filtered seawater throughout the operation.
- All instruments must be washed and sun dried before their use.
- Sponges must be clean and moist. Different sections of the sponges must be used for each wiping operation.
- Wooden blocks must be clean, smooth and moist all the time.
- Shrunken mantles should not be used due to difficulty in handling them.
10.5 Conditioning for surgery
Natural conditioning is ideal and inexpensive, however it can be practised only in regions where there is stratification of seawater temperature, as well as sharp difference in food availability. This method works well in the sea conditions in Japan. Using the thermal differences, the oysters are spawned in the upper water layers which have a relatively high temperature. With the loss of the stored energy, due to spawning, the weakened oysters are further subjected to starvation by placing them at depths where phytoplankton production is low, in order to reduce their metabolic rate. Such conditioned oysters can be readily used in surgery.Where such techniques do not work, such as in Indian waters, chemical conditioning is resorted to. Menthol crystals are sprinkled over the seawater in the tanks in which the oysters are placed. In about 60–90 minutes, the oysters become narcotised and relax their adductor muscles and open the valves. The time of response varies with the water temperature, however once narcotised the oysters become almost non-responsive to touch. The conditioned oysters are usually operated within the next 10 to 15 minutes as prolonged exposure causes swelling of tissues, copious secretion of mucus and mortality. A duration of about 30–40 minutes after response is the safe limit, and therefore the pearl oysters should be treated in batches.

10.6 Surgery
The number of nuclei to be implanted in one oyster is usually decided before the operation. Single and double implantations are common while multiple implantations are usually carried out when large numbers of small pearls of about 2–3 mm are required. Large diameter nuclei, in the range of 6–7 mm, are generally used in single implantation, one nucleus in each oyster. Nuclei with diameters ranging from 4–6 mm are used for double implantation, a large and a small one in each oyster. Nuclei with diameters of 2–3 mm are generally used in multiple implantations, five or more nuclei in one oyster.The best site for nucleus implantation is the gonad, particularly in its ventral portion. Single implantation is always done at this site. In double implantation, the above site is used for the larger nucleus while a site in the dorsal region of the gonad, close to the hepato-pancreas, is used for the smaller nucleus.
The steps involved in pearl oyster surgery are as follows:
- Insert the end of the speculum through the posteroventral corner of the oyster and open it by sliding backward the gap-regulator ring (Plate VIII A). Attention should be paid not to open the oyster too much as the adductor muscle may snap and kill the oyster.
- Mount the oyster with the speculum on the clamp. The oyster should be placed correctly between the two plates of the clamp so that it does not slip. The speculum is now towards the left-hand side of the technician.
- Hook the tip of the foot with the needle with the left hand and gently pull it so that the base of foot is slightly elevated. Hold the needle in position until the operation is completed.
- With the oval knife end of the incision-cum-grafting needle in the right hand, make a sharp incision at the base of the foot. Through this opening, passing the needle below the outer skin, steadily and gently cut a passage through the gonad connective tissue up to the site of implantation. Gently withdraw the needle.
- Pick a piece of graft tissue, already on the block, with the tip of the needle (same needle as above but reversed) and gently insert it through the passage cut in the gonad. On reaching the site, gently deflect the needle and allow the graft tissue to drop. Withdraw the needle. Now the outer epithelium of the graft tissue is facing the passage (Plate VIII B).
- Lift a nucleus with the moistened cup end of the appropriate nucleus-implanting needle and gently insert the nucleus through the gonad (Plate VIII C and D). On reaching the site, deflect the needle gently so that the nucleus drops. At this stage the nucleus must be in contact with the outer epithelium of the mantle tissue which was grafted into the gonad by the preceding step. Withdraw the needle gently through the passage.
- Smoothen the incision with the cup end and let the two margins of the incision come in contact. The nucleus implantation operation is now over.
- Remove the oyster from the clamp, withdraw the speculum by slipping the gap-regulator ring forwards and place the oyster in clean seawater.
Precautions
- Before and after use, wash the instruments in clean seawater.
- Adjust the pressure on the foot in a way that the foot does not get torn while pulling it with the needle hook.
- The incision should be a sharp cut and of the required length for the size of nucleus to be inserted. If the incision is too large the nucleus may slip out. If there is too much tear of tissues, do not proceed. Place the oyster back in fresh seawater and return to the farm for future use.
- While cutting the passage through the gonad, if there is copious flow of gametes, do not proceed but return the oyster to the farm.
- Do not cause damage to the vital organs such as stomach, intestine and heart during the surgery.
- The orientation of graft tissue (outer epithelium) and nucleus should be correct.
- Skill and patience are the key factors for a successful operation.


PEARL FORMATION
11.1 Natural pearl formation
The principal causative factor in pearl formation in a pearl oyster is the presence of a nucleus. It can be of organic or inorganic origin, such as parasites adults or larvae, molluscan eggs, decaying parts of plants, sand grains, epithelium or blood cells of the same animal, etc. These tiny particles or organisms enter the oyster when the shell valves are open for feeding and respiration. These foreign bodies may become embedded between the shell and mantle. In response to this stimulus, the foreign body is invaginated by the outer epithelium of the mantle and a pearl-sac is formed around it (Fig. 7 A).Pearls are not produced without the formation of the pearl-sac. The pearl-sac is derived from the internal or external layer of the apithelium of the mantle or of the gill plates. The epithelial cells of the pearl-sac secrets the nacre which becomes deposited over the foreign body, forming a pearl in due course of time. These pearls are produced either within the mantle, in other soft tissues of the oyster, or between the mantle, and the interior surface of the shell. Such pearl production is accidental and occurs very rarely. They are generally small and irregular. Large and spherical pearls are still rarer to find. When the extraneous matter becomes fixed to the shell, only the exposed portion becomes covered by the pearl-sac resulting in a blister pearl.
11.2 Cultured pearl formation
Cultured pearls are formed in a pearl oyster, thanks to human interference. In any pearl formation, two things are required, the outer epithelium of the mantle lobe and core substance or nucleus. It was found that cut pieces of the mantle epithelium would provide the pearl secreting cells and that processed shell beads would be accepted by the oyster as the foreign body. Through careful surgery, the mantle piece graft tissue and the shell bead nucleus are implanted together, side by side, into the gonad of the oyster.The oysters are then returned to sea for further growth. The outer epithelial cells of the graft tissue proliferate and rearrange themselves over the shell bead nucleus, forming a pearl-sac. The inner epithelium and connective tissue of the mantle disintegrate and become absorbed by the surrounding tissue. The cells of the pearl-sac derive their nourishment from the surrounding tissues and soon reassume their function of nacre (mother-of-pearl) secretion which is deposited over the nucleus in the form of concentric micro-layers (Fig. 7 C). The nacreous matter consists of thin alternate layers of aragonite and conchiolin deposited around the nucleus. The conchiolin is organic in nature and consists of mucopolysaccarides. It forms the binding layer for the aragonite crystals. The aragonite layers are 0.29–0.60 mm thick and are made of calcium carbonate in the form of highly laminated crystals. In cultured pearls the nacre quality and the process of pearl formation are the same as in the formation of natural pearls. Cultured half-pearls (Fig. 7 B) are produced by affixing many nuclei on the inner surface of the shell valves. The outer epithelium of the mantle forms the pearl-sac on the free surface of the nucleus and the halfpearl is formed.

POST-OPERATION CULTURE
12.1 Culture conditions
Freshly operated oysters should be reared undisturbed for a few days. If kept in the laboratory, they should be placed in plastic troughs or FRP tanks, where seawater is allowed to flow gently. If no flow-through system is available, the seawater has to be changed frequently to overcome the narcotizing effect of menthol. When normalcy is resumed, the oysters slowly re-open their valves and commence their pumping and filtering activity. If the sea is not calm, it is desirable to rear the operated oysters under laboratory conditions till the wound heals completely. The normal duration of wound healing is only a day or two. However, if the surgery is rough or the incision is large, the nucleus could slip out of the oyster, if cultured in rough waters.In Japan, newly operated oysters are hung in deep and calm waters for a period of 2–3 weeks, by which time they recuperate fully. Afterwards they are hung as in normal culture practices. However, in areas where the inshore waters are not calm, as in India, it is always advisable to keep the operated oysters for 3–4 days in the laboratory under observation and then transfer to the farm. If the oysters are suspended in rough sea immediately after the operation, they will be subjected to undue stress, which may lead to the dislodging of the nuclei.
Some Japanese pearl culturists examine the pearl oysters individually after recuperation by fluoroscopy, in order to check the condition of the inserted nucleus. Only those with the nucleus in the proper position are further cultured for pearl production, while the rejected ones will be retained as mother oyster for future use.
The quality of the pearl to be formed is influenced by several hydro-biological factors, such as primary production, temperature, current, trace metals content, etc. Coastal waters deeper than 5 m are usually favourable for the formation of high quality pearls. However, the culture site and depth at which the hanging culture structures should be fixed must be carefully chosen to have the most favourable conditions for the culture of the pearl oysters.
During the post-operation rearing period, the oyster density in the culture cages and culture grounds should be kept at a minimum. Over-crowding may cause adverse effects such as production of low quality pearls, slow formation of the nacre layer, shell damage and physical stress, as well as oyster mortality from diseases and parasites.
The oysters must be suspended in areas of high phytoplankton production and also at greater depths than the mother oysters. Settlement of undesirable organisms and silt on the oysters is responsible for the formation of poor quality pearls, slow formation of the pearl layer and oyster mortality. Hence the oysters should be monitored periodically and fouling organisms thoroughly eliminated. In Japan, when the seawater temperature drops below 10 °C during winter, the rafts are towed to warmer water bodies to allow the pearl oysters to over-winter.
The length of the culture period following the operation phase depends on the size of the nuclei inserted and the desired size of the pearls to be obtained. The Culture period ranges between 3–24 months for 2–7 mm diameter nuclei under tropical conditions. Periodic sampling of each oyster batch will give the basis for deciding on when to harvest. Pearls with a thin nacreous layer usually will not have good lustre and iridescence, and therefore command a lower market price.
PRODUCTION OF CULTURED PEARLS
Cultured pearls are produced by pearl oysters as a result of delicate techniques developed by scientists over many years. However, the human role in the pearl production process stops with the successful completion of surgery for nucleus implantation and in providing suitable environmental conditions through careful selection of the culture sites. The actual pearl formation, which results due to an internal biological process, is left entirely to the pearl oyster itself. The quality of pearls with regard to their shape and colour, which are important factors in terms of their market value, are not only influenced by external environmental factors, but also by the inherited capabilities of individual oysters.13.1 Development of implantation technique
Free spherical cultured pearls are produced with the help of spherical shell beads, known as nuclei. These beads are manufactured from the shell of a freshwater mussel species found in the Tennessee and Mississippi Rivers in the U.S.A. These shells are collected and exported to Japan, where they are cut and processed into precisely spherical beads of different diameter.In the initial phase of the development of the implantation technique, the shell bead nuclei were wrapped in mantle tissue and implanted into the visceral mass of the pearl oyster. Later it was found that a small piece of the mantle epithelium would suffice for the formation of the pearl-sac, which is responsible for the secretion and deposition of the mother of pearl on the nucleus itself. A small piece of mantle section measuring 2×3 mm in size, is sufficient for nuclei of 2–6 mm in diameter. The thickness of the epithelium layer plays an important part in the formation and quality of the pearls. The inner epithelium and the connective tissue rapidly disintegrate, leaving only the outer epithelium layer to proliferate and form the pearl-sac. Water soluble eosin and mercurochrome are some of the chemicals used as sterilising and colouring agents to enable the operator to place correctly the graft tissue, in terms of its orientation, at the time of insertion.
Oysters may die in the culture farm due to a variety of reasons. A common cause of death is serious infection of the wounds inflicted at the time of the implantation operation. However, diseases, biofouling, shell boring and pollution may also be responsible for oyster mortality. Proper farm management procedures usually keeps the oyster mortality rate below 10 %.
13.2 Nucleus retention and pearl production
Nuclei ejection does not commonly occur, particularly in the case of large ones. However, this miss-happening can be kept to the minimum by improved surgical methods. Discharged nuclei are usually thrown away. However, in some cases they are retained for re-implantation as no nacre has been deposited over them, probably due to the non-formation of the pearl-sac. Defects in surgery and incorrect orientation of the nucleus and graft are two of the reasons for this defect. In cases of non-formation of pearls, the nucleus may either remain as it is or become eroded.As in the case of natural pearls, the production of cultured pearls is also a result of a biological process within the pearl oyster itself. Therefore, the quality and the rate of cultured pearl production are only partly controlled by the activities of the pearl culturists. The production rate can be improved by adopting appropriate technology and care during surgery and subsequent culture. ‘Gross production’ usually refers to the number of cultured pearls produced by oysters which have survived the implementation of the shell bead. In India, the highest recorded production rate achieved in single implantation was about 65%, while in multiple implantation, a rate up to 180% has been obtained. This rate can definitely be improved by professional technicians with considerable knowledge and practical experience.
The gross production of pearls includes all kinds of pearls, from the finest quality to trash. Usually a small percentage of the pearls produced have an outstanding colouration and perfectly round shape, while a large proportion are inferior and some totally valueless as gems. This is a common feature in all pearl culture centres around the world. Generally the success of a pearl culture industry depends greatly on a high production of good quality pearls as a percentage of the total numbers produced.
Shirai (1970) has categorised the cultured pearls as follows:
Class A
Features: flawless, one flaw, small flaws, small stain marks, pink, silver or light cream in colouration. These pearls are further classified into:
| A-1: | Top pearls-perfectly round, pink, flawless and lustrous. This class may also include pearls with small blemishes of the size of a pin point. |
| A-2: | First class pearls - with slightly larger pits and protuberances. When treated these pearls become indistinguishable from the pearls categorized as A-1. |
Features: fairly large flaws, stain marks, creamy in colouration, and irregularities in the shape.
Class C
Features: wild shaped, badly coated, heavily marked, clayey lumps, half good and half bad. These pearls are usually referred to as ‘trash pearls’.
Generally, in a commercial pearl culture farm the combination of class A and class B pearls should account for at least 60 % of the gross production of cultured pearls for it to run economically. The remaining 40 % of class C pearls are usually rejected. However, their nuclei can be often salvaged and reprocessed.
13.3 Pearl harvesting
Harvesting of the cultured pearls is usually carried out manually. However, the process can be automated with the use of simple machines. In the case of manual extraction the pearls are collected by initially separating the two shell valves, by cutting the adductor muscle, making an incision on the gonad and squeezing the pearl out. The machines used for pearl extraction usually work by dissolving the oyster soft body parts with the use of chemicals while the pearls remain as they are and become easily extractable. In case the oysters need to be re-used for a second time, the pearls are carefully removed by opening the pearl-sac through the gonad taking care not to damage nor stress the oyster. The oysters are then returned to the culture site for recovery, and after a certain length of time they can be operated for a second time to produce additional pearls. In Japan, harvesting is done during periods of low temperature and pH as the pearls tend to be of higher quality due to a thick and compact outer nacreous layer.Finally, the harvested pearls are washed in distilled water, polished with refined salt and sorted for sale according to size, colour, shape, lustre and other external characteristics.
IMPROVEMENT OF PEARL QUALITY
14.1 Measures for enhancing pearl quality
Quality commands a premium price in pearls. The success of the pearl culture industry depends on the high rate of production of quality pearls. Therefore, considerable attention is paid to this aspect. The value of a pearl is decided by its quality, size, shape, colour and lustre. Exceptional pearls command special premium price.Being a product of biological origin, individual variations are bound to occur in each and every pearl. The secretion of the mantle or the pearl-sac, which leads to the formation of the pearl, may be organic or inorganic in origin, or a combination of both, with unpredictable and subtle variations in structure and composition. The final product may range from the finest to the trash due to such variations.
Even under the highest possible human control, the quality of cultured pearls cannot be controlled absolutely, but can be considerably improved through appropriate care in surgery and during farming. Only the size and shape of the cultured pearls are under the control of the pearl culturist. However, the colour and lustre, which depend on the secretion of the pearlsac, can also be improved to some extent by proper understanding of individual biological and physiological factors as well as the environmental conditions of the culture farms, which influence the formation of pearls.
To achieve a high rate of production of quality pearls, the following factors are required to be taken care of:
14.1.1 Oyster selection
Large oysters, in terms of size and weight should be selected. They must be free from a heavy fouling load and blisters caused by sponges and polychaetes. The oysters should be healthy as can be judged from the colour of the visceral mass and gills.14.1.2 Narcotization of oyster
The amount of menthol required to narcotize, and the duration of narcotization should be carefully adjusted depending on the volume and weight of the oysters.14.1.3 Graft tissue preparation
The graft tissue is one of the most critical factors in controlling the rate of pearl production. The donor oyster should be of the desirable size with a well developed and healthy mantle. Extreme care should be taken in selecting, stretching, cleaning, trimming and cutting of the donor mantle tissue. Good water quality and correct level of the chemical agents should be used in maintaining the tissue pieces.14.1.4 Implantation
The nucleus implantation is one of the most important factors in cultured pearl production. Its success greatly depends on the selection of the correct site and skill of the technician. The positioning and orientation of graft tissue in contact with nucleus is also critical and should be carried out with great skill and patience. Multiple nucleus implantation requires still greater care and patience.14.1.5 Oyster convalescence
Oysters can be made to recover from the effect of narcotization through periodic changes of water or gentle flow-through. Sufficient time must be allowed for the incision wound to heal before taking the oysters to the sea for further farming.14.1.6 Tool maintenance
The tools must be sharp, rust-free and should have been either sterilized or suitably cleaned and sun-dried.14.2 Colour of pearls
Different molluscs produce pearls of different colours. The colour of a pearl is usually similar to the colour of the shell nacre of the mollusc which produces it; this character is genetically controlled. This is very clearly shown by Pinctada margaritifera (black or steel grey), P. maxima (silvery white), abalones (green) and freshwater mussels (pink). However, in the case of P. fucata, the colour of the pearls produced may be golden yellow, pink, white or cream, depending on slight differences in the site of nuclei implantation. The pearls produced in the ventral region of the gonad are white or golden, while those produced in the dorsal region of the gonad, in proximity to the hepato-pancreas, are usually grey or white. Flawless pearls of regular form are frequently seen among the pearls developed in contact with internal organs, such as liver, byssal gland and intestine. Pearls produced close to the retractor muscle tend to be baroque in shape with irregular protrusions and with a distinct black colouration.The thickness of the epithelium of the graft tissue is also considered to be responsible in determining the quality of pearls. A thin graft (2–10 μm) usually produces pearls with a good surface, while thicker ones (>20 μm) tend to produce dull and badly coloured pearls.
A number of environmental factors plays a predominant role in determining the colour and lustre of the pearl nacre. Water depth is one of the most important factors, as quality pearls tend to be produced in waters below 10 m. Fouling and boring problems and siltation are considerably less at depths of 10 m or more.
The pearl culture grounds also play a significant role in determining pearl quality, and repeated culture on the same ground has been shown to affect the quality of pearls. Organic substances discharged by the pearl oysters and fouling organisms are deposited on the sea bottom and their build-up eventually affects the chemical and physical state of the water. Periodic removal of these deposits increases the production of pearls with desirable quality. During the final “make-up culture” period, pearl oysters are shifted to places of potential quality pearl yielding grounds.
Temperature controls the metabolic rate of the molluscs. Higher temperature leads to faster growth in oysters and higher rate of nacre deposition. But this affects the quality of pearls. Thinner laminar nacreous layers, which result from low temperature and pH, are desirable at least in the later phase of the culture period, since the thinner mineral laminae in the upper layers of the pearl give a better lustre to the pearls.
The physiological state of the pearl oyster and the condition of the culture ground have bearing on oyster growth and the size and colour of pearl. This depends principally on differences in chemical composition of the seawater, as well as the kind and amount of plankton in the area where the pearl oysters are reared. The chief source of conchiolin are the nitrogenous substances of the plankton, which influences the colour of pearls.
Minerals and trace elements in the seawater are important, as these also influence the colour of pearls. It has been found that the golden and cream coloured pearls contain more copper and silver, while skin coloured and pink pearls contain more sodium and zinc. The golden coloured pearls have been found to contain more metallic elements than green pearls. The pearl colour varies according to the amount of porphyrins and metalloporphyrins present in them. Iron-bound peptide in the nacre favours the formation of yellow pearls. The organic substances deposited at the beginning of the pearl formation also would influence the colour. Good quality blue pearls are of this origin.
Short duration culture practice is another cause for inferior quality of pearls. Pearls should be allowed to reach maturity in proper time. Pearls with 0.5 mm nacre are accepted in the market.
The rate of nacre growth is dependent on the size of the nucleus. The pearl growth rate obtained at Tuticorin is as follows:
| Nucleus diameter (mm) | Thickness of nacre (mm) | Duration of culture (days) |
|---|---|---|
| 3 | 0.22 | 94–108 |
| 3 | 0.26 | 161 |
| 3 | 0.32 | 191 |
| 4 | 0.31 | 161 |
| 5.8 | 0.26 | 159 |
| Oyster size (mm) | Nucleus diameter (mm) | Thickness of nacre (mm) | Duration of culture (days) |
|---|---|---|---|
| 40–50 | 3 | 0.609 | 388 |
| 40–50 | 4 | 0.692 | 402 |
| 50–60 | 3 | 0.929 | 395 |
| 50–60 | 4 | 0.732 | 404 |
| 60–70 | 5 | 0.590 | 318 |
Processing of cultured pearls through bleaching and dyeing is a highly specialised technique for value addition. It is managed by the pearl processing technicians according to the market needs of various trading centres. It is believed that most of the cultured pearls in the market go through some kind of processing to remove minor defects and improve colour.
The structure and composition of pearls reveal that several formations are possible during the development of cultured pearls. Only those formed by aragonite crystals in tabular form, presenting a regular laminar brick wall-like structure with micro-layers of elemental mineral lamellae alternating with homogeneously deposited organic matrix in concentric layers around the inserted nucleus, would qualify as gems. The rest of the formations will have less or no commercial value.
The lustre of the pearl is due to the play of light on the laminated aragonite layers of the nacre due to absorption and reflection of the waves of incident light. Homogeneity, thinness and smoothness of these layers are responsible for the great play of lustre. Therefore, it is very important that the final phase of post-operation culture of every batch of oysters should be done under ideal conditions.
Cultured pearls are broadly classified into:
- nacreous layer pearls
- prismatic layer pearls, and
- organic layer pearls
Want to start Pearl Farming:
What you need
Water conditionWater conditions are the key to mussel growth with the best temperatures between 65 and 75 degree Fahrenheit. The water should be peaceful, well circulated, contain plenty of nutrients, have no pollution, and a depth of 6 to 8 feet (definitely not more than 12 Feet). If the water is too shallow, the temperature will shift too rapidly and the mussels will die. The flow speed should be about 20 Feet per minute. Ideal acid - alkali concentration is 7 to 8 ph. If it is too acidic, the pearls will be small; too much alkali and the pearls come out yellowish. Water visibility should be 6 to 12 Inches.
Pearl farming
Generally, planting is done between (March through May) and (September through October) since in the summer the water temperature is too high for just-opened host mussels to survive, while in winter it is too cold for technicians to carry through tricky implant work with their numb fingers. Harvest is usually between October and February; during the fall and winter seasons, mussels produce nacre layers more slowly, resulting in a smoother surface and higher luster.
Stages in farming
Selecting musselsFRESH WATER PRAWN CULTURE
The mussels are divided into two groups: those providing implantable tissue and mussels to be implanted. The selected mussels are soaked in a basin for a few days, cleaned and put in a tub with the water level slightly lower than the mussels so they can breathe.
In China, most farms use Hyriopsis Cumingii. This species usually yields the best quality round pearls with high luster and big size, but takes a long time to grow. In The United States the most frequently used in the culturing process are commonly referred to as the Washboard and Pigtoe varieties of the family Unionidae.
Buying implanted mussels.
While implanting mussels themselves, some farms also buy from small farms already implanted mussels that have been grown in water for 1 to 2 years. Though it costs much more, the risks are decreased since the mortality rate is highest during the first year after implanting. It is also a quality-control method simply because you won't spend money on those implanted mussels if you find the baby pearls inside are of low quality and irregular shape. Small farms, they are willing to sell their young mussels, as long as it's profitable. Implanting
The mussel is opened only about one half inch wide to avoid injury. A triangular slit is made between the Mother-of-Pearl layer and the Cell Lining. A piece of tissue is carefully placed in the opening and shaped using a needle. It is crucial that the tissue not make contact with the shell. The triangular slit runs from top to bottom one-half inch wide and one-quarter inch deep. The implanted tissues are placed one-quarter inch apart with three rows in each shell one-quarter inch apart. The number of tissues implanted depends on the size and health of a given mussel. For example, a 5-inch long mussel could be implanted with 30 to 40 pieces of tissue, with 15 to 20 pieces on each side.
Suspended in the water
Three or four mussels are placed in a nylon net and hung at 1-yard intervals from a long thick nylon rope above, which is tied to two poles at its two ends respectively. At a depth of 6 to 8 feet. The rope is floated by buoys.
Feedstock
It used to be that mussels were not fed after being placed in the water. It was assumed that they fed and grew by the nutrient contained in lake water. Now implanted mussels are given the utmost care. Feedstock now ranges from carbamide, soybean milk to fermented organic fertilizer such as bean cake and chicken manure; there is even manure developed specifically for pearl mussels.
Tending mussels
The mussels are taken good care of while suspended in the water. Check water temperatures and feeding conditions, moving the mussels up or down as appropriate. Periodically, the mussels are lifted from the water for cleaning and health treatments. Aquatic weed, barnacles and other organisms that might interfere with their feeding are removed from the mussel's shell. It is a lot of work, much of it repetitious and labor intensive. Tending the mussels is a continuous process aimed at smoothly developing the pearls to minimize blemishes.
Disease prevention and cure.
Implanted mussels are prone to bacteria, virus, plankton and other microorganisms. Some freshwater fish can eat the mussel's protruded meat while they are breathing. With the help from scientists, special medications have been invented and to some extent, diseases may be controlled, making it more possible to cultivate mussels for longer periods.
Cultivation period.
In the 1980's, mussels were cultivated 18 to 24 months before harvesting. This short time of cultivation resulted in small size (no larger than 7 - 8 mm.) and often-low grade freshwater pearls. This is why many people still rank freshwater pearls lower in quality than salt-water pearls. Since the 1990's, pearl farmers have gotten financially strong enough to extend the cultivation period to as long as 4 to 5 years. Now top quality freshwater pearls are available on the market with size up to 16mm.
Harvesting and Processing.
The harvested pearls are cleaned immediately in freshwater. They are scrubbed, and then washed in warm water followed by several more soap and fresh water washings. They are then dried and sent for sorting, drilling and matching.
The giant freshwater prawn is suitable for cultivation in tropical and subtropical climates. The most commonly cultured species in India is Macrobrachium rosenbergii. It is a hardy species by virtue of its ability to adapt to various types of fresh and brackish-water conditions. It accepts pelleted feed and has omnivorous feeding habit. The breeding takes place in low saline waters which is also needed for larval and post larval development after incubation. Breeding of M. rosenbergii takes place in estuaries. Though seed may be available in natural sources to a limited extent, for large scale culture there is a need to ensure regular supply of seed. For ensuring availability of quality seed in predictable quantity freshwater prawn hatcheries should be encouraged, technology for which is already developed. Freshwater prawn hatcheries are coming up in many states.
The aquaculture production of giant freshwater prawn, Macrobrachium rosenbergii in India has shown a phenomenal increase in recent years that has increased from less than 500 metric tonne in 1997 to more than 30,000 metric tonne in 2003. The major bottleneck for the further expansion of the prawn culture is the lack of adequate supply of post-larvae (prawn seed) for stocking. The projected seed requirement for the development of at least two lakhs hectare of water area in the coming years is 10,000 million. Indian aquaculture has been evolving from the level of subsistence activity to that of an industry. This transformation has been made possible with the development and standardization of many new production and associated techniques of input and output subsystems. In recent years aquaculture has created great enthusiasm and interest among entrepreneurs especially for shrimp farming in coastal areas. Shrimp farming is capital-intensive activity and uncontrolled mushrooming growth of it has led to outbreak of diseases and attributed environmental issues calling for closure of shrimp farms.
Although India has vast freshwater resources they are not fully exploited except for carp culture in limited scale. Fresh water fish culture employing composite fish culture technology has become popular for use in large number of tanks and ponds in the country. To meet the raw material required by the processing units for export demand there is urgent need to expand our production base. In addition it is always stressed that there is a need to utilise our natural resources productively to ensure the much needed food security.
Scampi production through aquaculture in India
| Year | Live Weight (MT) | Product Weight (MT) | Estimated Value (Rs. Crore) |
2003-04 | 35870 | 17935 | 700 |
2004-05 | 38720 | 19360 | 767 |
Percent increase | 7.95 | 7.95 | 9.57 |
(Source: Marine Products Export Development Authority, 2005)
Considering the high export potential, the giant fresh water prawn, Macrobrachium rosenbergii , the scampi, enjoys immense potential for culture in India. About 4 million ha of impounded freshwater bodies in the various states of India, offer great potential for fresh water prawn culture. Scampi can be cultivated for export through monoculture in existing as well as new ponds or with compatible freshwater fishes in existing ponds. It is exported to EEC countries and USA. Since the world market for scampi is expanding with attractive prices, there is great scope for scampi production and export.
State wise production details of scampi farming in India
No. | State | Scampi | ||
Area (Ha) | Production (MT) | Productivity (MT/Ha) | ||
1. | Gujarat | 4 | 3 | 0.71 |
2. | Maharashtra | 43 | 60 | 1.40 |
3. | Goa | 0 | 0 | 0.00 |
4. | Karnataka | 164 | 44 | 0.27 |
5. | Kerala | 911 | 268 | 0.29 |
6. | Tamil Nadu | 192 | 144 | 0.75 |
7. | Andhra Pradesh | 28096 | 34541 | 1.23 |
8. | Orissa | 3188 | 470 | 0.15 |
9. | West Bengal | 4395 | 3193 | 0.73 |
| Total | 36993 | 38723 | 1.05 | |
(Source: Marine Products Export Development Authority, 2005)
Biology
Macrobrachium rosenbergii is found in inland freshwater areas including lakes, rivers, swamps, irrigation ditches, canals and ponds, as well as in estuarine areas. This species requires brackishwater in the initial stages of their life cycle (and therefore they are found in water that is directly or indirectly connected with the sea). Mature male prawns are considerably larger than the females and the second chelipeds are much larger and thicker. The head of the male is also proportionately larger, and the abdomen is narrower. The head of the mature female and its second walking legs are much smaller than the adult male. A ripe or ‘ovigerous' female can easily be detected because the ovaries can be seen as large orange-coloured masses occupying a large portion of the dorsal and lateral parts of the cephalothorax.
The life cycle of M. rosenbergii can be summarized as follows. The mating (copulation) of adults results in the deposition of a gelatinous mass of semen on the underside of the thoracic region of the female's body (between the walking legs). Successful mating can only take place between ripe females, which have just completed their pre-mating moult (usually at night) and are therefore soft-shelled, and hard-shelled males. In tropical areas these coincide with the onset of the rainy season. Within a few hours of copulation, eggs are extruded through the gonopores and guided by the ovipositing setae (stiff hairs), which are at the base of the walking legs, into the brood chamber. During this process the semen attached to the exterior of the female's body fertilizes the eggs. The eggs are held in the brood chamber and kept aerated by vigorous movements of the swimmerets. The length of time that the eggs are carried by female freshwater prawns varies but is not normally longer than three weeks. The number of eggs that are laid also depends on the size of the female. Female prawns of M. rosenbergii are reported to lay from 80000 to 100000 eggs during one spawning when fully mature. Egg incubation time averaged 20 days at 28°C (range 18-23 days).
Freshwater prawn eggs of this species are slightly elliptical, with a long axis of 0.6-0.7 mm, and are bright orange in colour until 2-3 days before hatching when they become grey-black. This colour change occurs as the embryos utilize their food reserves. As the eggs hatch, rapid movements of the abdominal appendages of the parent disperse the larvae. Freshwater prawn larvae are planktonic and swim actively tail first, ventral side uppermost (i.e. upside down). M. rosenbergii larvae require brackishwater for survival. The larvae go through 11 distinct stages before metamorphosing into post larvae. Stage I larvae (zoeae) are just under 2 mm long (from the tip of the rostrum to the tip of the telson). Larvae swim upside down by using their thoracic appendages and are positively attracted to light. By stage XI they are about 7.7 mm long. Newly metamorphosed post larvae (PL) are also about 7.7 mm long and are characterized by the fact that they move and swim in the same way as adult prawns. They are generally translucent and have a light orange pink head area.
On completion of their larval life, freshwater prawns metamorphose into post larvae (PL). From this point onwards they resemble miniature adult prawns and become mainly crawling rather than free-swimming animals. When they do swim it is usually in a normal (dorsal side uppermost) way and in a forward direction. Rapid evasive movement is also achieved by contracting the abdominal muscles and rapid movement of the tail. Post larvae exhibit good tolerance to a wide range of salinities, which is a characteristic of freshwater prawns.
Post larvae begin to migrate upstream into freshwater conditions within one or two weeks after metamorphosis and are soon able to swim against rapidly flowing currents and to crawl over the stones at the shallow edges of rivers and in rapids. In addition to using the foods available to them as larvae, they now utilize larger pieces of organic material, both of animal and vegetable origin. Post larval freshwater prawns are omnivorous can also be cannibalistic.
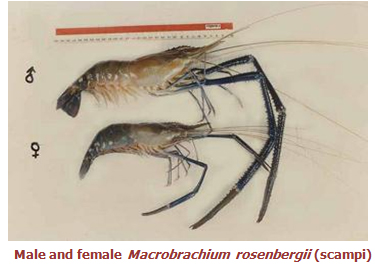
The site requirements for hatcheries and nurseries, which are normally associated with each other, are similar.
Availability of Quality Water
The hatchery and nursery should be located inland where there is ample supply of good freshwater. Saline water required for larval development can be transported and mixed with freshwater to attain the desired salinity. The quality of intake water, whether it is saline or fresh, is of paramount importance for efficient hatchery operation. Water quality is thus a critical factor in site selection. Hatchery sites should preferably be far from cities, harbours and industrial centres, or other activities, which may pollute the water supply. In all cases, water supplies need careful analysis during site selection, to determine their physical, chemical, and biological characteristics, and the extent to which these may vary daily, seasonally, or through other cycles.
Special care is needed in hatcheries that are situated in or near areas where the use of pesticides, herbicides, and fertilizers is intensive. Ideally, freshwater should be obtained from underground sources. The brackishwater for use in M. rosenbergii hatcheries should be 12-16 ppt, should have a pH of 7.0 to 8.5, and contain a minimum dissolved oxygen level of 5 ppm. High levels of heavy metals, such as mercury (Hg), lead (Pb) and zinc (Zn), should also be avoided, since these are most likely to be caused by industrial pollution.
Soil Characteristics
The ideal soil for freshwater prawn culture should be clay-silt mixture or sandy loam comprising of 60% sand and 40% silt with good water retention capacity. There must be enough soil available for pond construction, whether the ponds are to be excavated or pond banks are to be erected above ground. Although supplemental food is given to freshwater prawns reared in earthen ponds, a considerable amount of their food intake is from natural sources. It is therefore preferable to site the farm where the soil is fertile, as this will reduce the need and costs of fertilisation. Freshwater prawn ponds should be constructed on soil, which has good water retention characteristics or where suitable materials can be economically brought onto the site to improve water retention.
Pervious soils, which are very sandy or consist of a mixture of gravel and sand, are unsuitable unless the water table is high and surrounding areas are always waterlogged. Soils, which consist of silt or clay, or a mixture of these with a small proportion of sand, normally have good water retention characteristics. Peaty soils are not suitable. The clay content should not exceed 60%; higher clay content soils swell when moist and crack during the dry season, thus making repairs necessary.
Other requirements for Hatchery sites
In addition to having sufficient supplies of good quality water, a good hatchery site should also have:
• A secure power supply, which is not subject to lengthy power failures. An onsite emergency generator is essential.
• Have good all-weather road access for incoming materials and outgoing PL;
• Have access to food supplies for larvae;
• Employ a high level of technical and managerial skills;
• Have access to professional biological assistance from government or other sources;
• Have its own indoor/outdoor nursery facilities or be close to other nurseries and
• Be as close as possible to the market for its PL. In the extreme case, it should not take more than 16 hours of total transport time from the furthest farm to the market.
Site Selection for Outdoor Nurseries and Grow-Out Facilities
The success of any nursery facility or grow-out farm depends on its access to good markets for its output. Its products may be sold to other farms (in the case of nurseries), directly to the public, to local markets and catering facilities, or to processors or exporters. The needs and potential of each type of market need to be considered.
It also important to consider other factors to ensure success, including the:
• Suitability of the climatic conditions;
• Suitability of the topography;
• Availability of adequate supplies of good quality water;
• Availability of suitable soil for pond construction;
• Maximum protection from agricultural and industrial pollution;
• Availability of adequate physical access to the site for the provision of supplies and the movement of harvested animals;
• Availability of supplies of other necessary inputs, including postlarval and/or juvenile prawns, equipment, aquafeeds or feed ingredients, and power supplies;
• Availability of good skilled (managerial) and unskilled labour;
Topography
Farms must be close to their market so the road access must be good. Large farms will need to have local access for heavy trucks be able to reach the farm easily, for the delivery of supplies and the efficient collection of harvested prawns.
A survey is necessary, to assess the suitability of a site from a topographical point of view. It is important to minimize the quantities of earth to be shifted during pond construction. Flat or slightly sloping lands are the most satisfactory. The ideal site, which slopes close to 2% (2 m in 100 m), allows good savings on earth movement. Care should be taken to ensure that pond sizes and alignments allow efficient construction, and at the same time permit good access and effective water supply and drainage.
Climate
The meteorological records such as temperature, the amount and seasonality of rainfall, evaporation, sunlight, wind speed and direction, and relative humidity should be studied for site selection. Avoid highly unstable meteorological regions. Strong storms and winds increase the risks of flood and erosion damage, and may lead to problems with transport access and power supply.
Temperature is a key factor. Seasonal production is possible in semi-tropical zones where the monthly average air temperature remains above 20°C for at least seven months of the year. The optimum temperature range for year-round production is between 25 and 31°C, with the best results achievable if the water temperature is between 28 and 31°C. The temperature of the rearing water is governed not only by the air and ground temperature but also by solar warming and the cooling effects of wind and evaporation. The rate by which pond water is exchanged and the temperature of the incoming water are also important considerations.
Rainfall, evaporation rates, relative air humidity and wind speed and direction also need to be investigated. Ideally, evaporation losses should be equal to or slightly lower than rainfall input, to maintain an approximate water balance. Mild winds are useful to promote gas exchange (oxygenation) between water and the atmosphere. However, strong winds can increase water losses by evaporation and may also generate wave action, causing erosion of the pond banks. Avoid areas where it is constantly cloudy because this makes it hard to maintain a steady water temperature, as it interferes with solar penetration. Periods of cloud cover of several days' duration may also cause algal blooms to crash, which in turn lead to oxygen depletion.
Nursery Phase
The nursery can be either indoor or outdoor. The selection of sites for indoor nurseries should follow the same pattern as for hatcheries. Site selection for outdoor nursery facilities should be similar to that for grow-out ponds.
Holding Tanks
After rearing freshwater prawns in hatchery, hold them until ready for stocking in ponds. Concrete tanks of 50 m3 are convenient for holding postlarvae (PL) prior to transport for stocking in ponds. Use nets suspended from floats in the tanks to increase the surface area available to the PL but this may make the normal operations of feeding, cleaning etc. more difficult.
Indoor Nursery Facilities
Tanks for indoor freshwater prawn nurseries can be constructed from concrete or fibreglass. The use of asbestos cement tanks is not recommended. The shape of nursery tanks is not important and their size, usually from 10 to 50 m2 with a water depth of 1 m. The best stocking density for indoor nursery tanks depends on the length of time the animals will remain in the tanks before transfer to an outdoor nursery or grow-out facility. It is recommended not to exceed a stocking density of 1000 PL/m3 in tanks without substrates.
Artificial substrates of various designs and materials can be used to increase surface area; these provide shelter and increase survival rates. Layers of mesh can therefore be used to increase the amount of surface edges available to the prawns in both vertical and horizontal planes. The water supplies for indoor nurseries can be flow-through or recirculating. For flow-through, water is allowed to continuously enter from above the tank and exit from the lowest part of the tank through a vertical standpipe. Standpipes are covered with a 1.0 mm mesh screen to prevent PL and juveniles from escaping. This drainage system draws water from the tank bottom where food waste and detritus settle.
Outdoor Nursery Facilities
Nursery ponds are similar to grow-out ponds in design and facility requirements. They usually vary in area from 300 to 2000 m2 . Artificial substrates can be used to increase the surface area available to the prawns. PL is retained in holding tanks for more than a week or two prior to stocking in nursery facilities, grow-out ponds. Whilst the PL are in the holding tanks water is exchanged at a rate of 40-50% every 2-3 days and provide aeration. PL is at densities of up to 5000 PL/m2 for one week, or up to 1500-2000 PL/m2 for one month under these conditions. If you need to hold them for one month, you could improve survival if you reduce the density to 1000/m2. Using substrates can help you maximize the stocking density, thus reducing other equipment and labour costs.
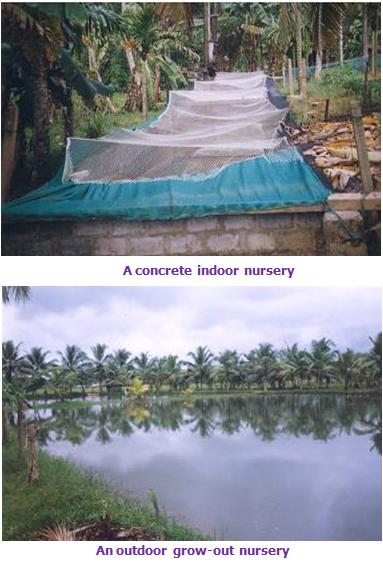
Water quality and supply
Freshwater is normally used for rearing freshwater prawns from postlarvae to market size. Water of 3-4 ppt salinity may be acceptable for the culture of M. rosenbergii. The reliability of the quality and quantity of the water available at the site is a critical factor in site choice. However, as in the case of hatchery water supplies, the absolute ‘ideal' for rearing sites may be difficult to define; a range of water qualities may be generally suitable. As for hatchery water, the level of calcium in the freshwater seems to be important. Growth rate has been reported to be lower in hard than in soft water. It is recommended that freshwater prawn farming should not be attempted where the water supply has a total hardness of more than 150 mg/l (CaCO3).
Water quality requirements for prawn nursery and grow out
Variables | Recommended range |
Temperature (oC) | 28-31 |
pH | 7.0-8.5 |
Dissolved oxygen (ppm) | 3-7 |
Salinity (ppt) | <10 p="p"> |
Transparency (cm) | 25-40 |
Alkalinity (ppm) | 25-60 |
Total hardness (ppm) | 30-150 |
Ammonia (ppm) | <0 .3=".3" p="p"> |
Nitrite (ppm) | <2 .0=".0" p="p"> |
Nitrate (ppm) | <10 p="p"> |
Boron (ppm) | <0 .75=".75" p="p"> |
Iron (ppm) | <1 .0=".0" p="p"> |
Copper (ppm) | <0 .02=".02" p="p"> |
Manganese (ppm) | <0 .10=".10" p="p"> |
Zinc (ppm) | <0 .20=".20" p="p"> |
Hydrogen sulfide (ppm) | Nil |
(Source: Food and Agriculture Organisation, 2002)
Greenwater System of Freshwater Prawn Culture
A more common alternative to the ‘clearwater' system for flow-through hatcheries is known as the ‘greenwater' system. In the greenwater system, a mixed phytoplankton culture in which Chlorella spp. is dominant is maintained in separate tanks. Its cell density is about 750000-1500000 cells/ml. A fertilizer solution in tap water is added to the tanks at least once per week to maintain the culture. This solution provides a mixture of 4 parts of urea to 1 part of NPK (15:15:15) garden fertilizer, applied at the rate of 185 g per 10 m3 tanks. Tilapia (Oreochromis mossambicus) is held in the tanks at the rate of about 1 per 400 l to graze on and control filamentous algae. Copper sulphate, at the rate of 0.6 ppm is added to the greenwater tanks once per week to control rotifers. The tilapia also helped to fertilize the culture. The sodium salt of EDTA (ethylene diaminetetraacetic acid) is included in the greenwater culture at 10 ppm as a chelator. The greenwater is prepared at the same salinity as the larval rearing water. Greenwater does not thrive at more than 12 ppt salinity. The greenwater culture is never used for larvae if the culture is more than three days old. Part had to be discarded or used for filling larval tanks and the rest diluted regularly to avoid phytoplankton ‘crashes' occurring in the larval tanks. Although the greenwater system may have some advantages, it is difficult to manage successfully and adds more complications to the hatchery process. For this reason, most commercial freshwater prawn hatcheries now use clearwater systems of management, whether they are flow-through or recirculation.
Semi-Closed, Two Phase Clear Water Larval Rearing Technology
Central Institute of Freshwater Aquaculture has developed and standardized a two-phase clear water technology for larval rearing that is suitable for non-coastal hatcheries. This technology can be suitably modified to suite other locations also. Healthy mother prawns (bearing grey eggs on their pleopods >50 g) are selected from the broodstock pond/tank and disinfected with 0.3 ppm copper sulphate or 30 ppm formalin for 30 min. Mother prawns are then stocked @ 100-150 g/m2 (2-3 nos of ~ 50 g female) in brackishwater (salinity of 5‰) and reared till hatching. Tanks are checked daily for appearance of larvae.
Once hatching occurs it may continue for 24-48 h. The spent female is removed from the tank and released back to the broodstock pond. The salinity of the larval rearing medium is then increased to 12‰ and the rearing is continued in the same tank. In the first phase the larvae (Zoea I) are stocked in cylindro-conical tanks at a high density (200-300 larvae/l). About 50% of the medium is usually exchanged every other day with fresh medium of identical salinity. The larvae are reared for about 10-12 days in this phase. In the second phase, the advanced larvae are stocked in larger tanks with a greater surface area at the rate of 50-80 per litre and reared till metamorphosis. About 50% of the medium is exchanged every alternate day.
The freshly hatched Artemia nauplii are given as live food to the prawn larvae, 4-5 times per day in the early stages (Stages II to V or VI) and later, once during late evening in combination with wet larval feed which is usually given during day time. The brine shrimp nauplii are fed to the prawn larvae at the rate of 5 to 50 nauplii per larva per day. About 2 kg of Artemia cysts are required to produce one-lakh post-larvae.
Wet larval feed (egg custard, minced fish/mollusc flesh; protein level> 50%) is fed @ 50-200 mg/larva/day depending on the larval stage. The wet feed is given from 8 am till 2 pm at one-hour interval. The larval rearing tanks are cleaned daily by siphoning off excess food particles and metabolic waste from the bottom of the tank. This is done after stopping aeration, preferably in the evening hours before exchange of water and introduction of live food (Artemia nauplii). Daily monitoring of temperature, salinity, pH and dissolved oxygen levels is essential to maintain the water quality at optimum levels. The optimum ranges of water quality parameters for successful seed production are given below.
Water temperature | - | 29-31ºC |
Salinity | - | 10-13% |
pH | - | 7.0-8.5 |
Dissolved oxygen | - | >5 ppm |
Nitrite | - | <0 .1=".1" p="p" ppm="ppm"> |
Ammonia (NH3 -N) | - | <0 .1=".1" p="p" ppm="ppm"> |
The appearance of first post-larva is usually observed 20 days after hatching, normally between 22 and 26 days (at 28-32°C) and 90% larvae metamorphose within next 10 days. The seed production normally ranges between 35-40 per litre and the cycle lasts for 35-40 days. The post-larvae are gradually acclimatized to the freshwater and reared at high densities (2000-5000/m2 ) for 10-15 days in hatchery. The post-larvae are fed with formulated diet @ 100% of the biomass per day. After a week post-larvae are suitable for stocking in grow-out ponds.
Harvest of post-larvae
New postlarvae (PL) are about 7-8 mm long. Although PL can withstand the physiological shock of sudden transfer from 12 ppt water into freshwater, it is not recommended to harvest them from the larval tanks and transfer them directly into holding tanks containing freshwater. The animals are best acclimatized to freshwater in the larval tank. Once the majority of larvae have metamorphosed (at least by day 32-35) water level in reduced in flow-through system tanks to about 35 cm. The PL can then be harvested and transferred, or the larval tanks refilled to 70 cm with freshwater and the animals temporarily held in them. If the latter is done, the PL should only remain in the larval tanks for a few more days, with frequent water exchange, before transfer to a larger holding tank. The best way to harvest PL from the larval tanks is to reduce the water level and then remove them in dip nets. Most flow-through hatchery operators harvest their post larvae only once, at the end of the production cycle.

Nursery pond management
The preferred stocking density in the nursery pond is 20/m2. Post-larvae (8-10 mg) may be fed with pellet diet (crude protein 35%; lipid 8%) in crumble form @ 100% of the biomass during the first fortnight and further reduced to 50% in subsequent period. In the absence of pellet diet a mixture of groundnut oil cake (powdered) and rice bran may be given as feed. The feed should be broadcasted in the pond twice daily preferably in the morning and in the late evenings. In nursery ponds approximately 10% of the pond surface may be covered with floating weeds with dense root system such as Eichhornia sp. to improve the survival rate of post-larvae. The weeds should be kept inside a PVC or bamboo frame to avoid their spreading in the pond. Aeration is provided for ~8 h/day.
A fortnight after stocking sampling of post-larvae may be done to observe the growth using cast net or fry net. During nursery rearing water temperature may be checked twice daily. pH, dissolved oxygen, transparency and depth may be checked once every week and to be maintained in optimum ranges. Loss of water due to seepage and evaporation should be compensated by water addition at least once every fortnight. Nursery rearing may be done for 45-60 days. At the end of rearing period the juveniles (>1.0 g) are collected by dewatering the pond and transferred to grow-out ponds
Juvenile prawns can be harvested by seining your ponds two or three times with a 5 to 6 mm mesh seine, or by emptying them completely. Polypropylene boxes or tanks filled with water from the nursery pond and kept aerated, can be used to transport the juveniles to the grow-out ponds if they are close by. There are some advantages in grading the juveniles into two or three groups, depending on their average weight, before stocking them into separate grow-out facilities. This decreases competition in grow-out ponds by reducing Heterogeneous Individual Growth (HIG) and increases productivity. Some mortality (10-20%) will occur soon after PL are stocked, even when the conditions are ideal. Total survival from stocking until removal from the nursery ponds should be at least 75%. The weight of the prawns at the end of the outdoor nursery period should be about 0.8-2.0 g, but the time taken to reach those sizes will depend on local conditions.
Grow-out phase
A freshwater prawn farm is very similar to a freshwater fish farm. Prior to initiation of culture the ponds should be well prepared. The pond bunds/dykes should be repaired and strengthened. Ponds should be drained and the pond bottom should be exposed to sun for a week to kill all predatory fishes. Rectangular ponds are suitable mainly from the harvesting point of view. A convenient width is 30-50 m, whereas length of the pond depends on site, topography and farm layout. Normally a size of 0.5 to 1.5 ha is found suitable. The average depth of the ponds should be 0.9m with a minimum of 0.75m and a maximum of 1.2 m. Dike and pond slope may be kept at 2:1. Bund must have a freeboard of at least 60 cm above the highest water level in the pond. Designing and layout of the farms may be done keeping in view the water intake and water outlet facilities. The drainage system should be designed carefully to prevent mixing of outlet water with incoming water.
Lime may be applied as per the requirement after testing the soil pH. It can be applied @ 200 kg/ha, if the soil pH is between 6.5-7.0. Higher dose will be required in case of soil with low pH values. Water should be let into the pond up to two feet using nylon mesh nets to prevent the entry of eggs and larvae of predatory fishes and competitors. Pond should be fertilized with raw cow dung/poultry manure and super phosphate as per the requirement. In general for a pond of medium nutrient contents the fertilizers may be applied at the rate of 5 tonnes raw cow dung, 200 kg urea and 300 kg/ha/crop super phosphate. After a week of fertilization the pond should be filled up to 4 feet water level. Transparency of pond water should be checked after 2-3 days using a secchi disc. Ponds can be stocked with post-larvae in case of nursery pond and with juveniles in case of grow-out ponds once the transparency is 30-35 cm during early morning or late evening hours.
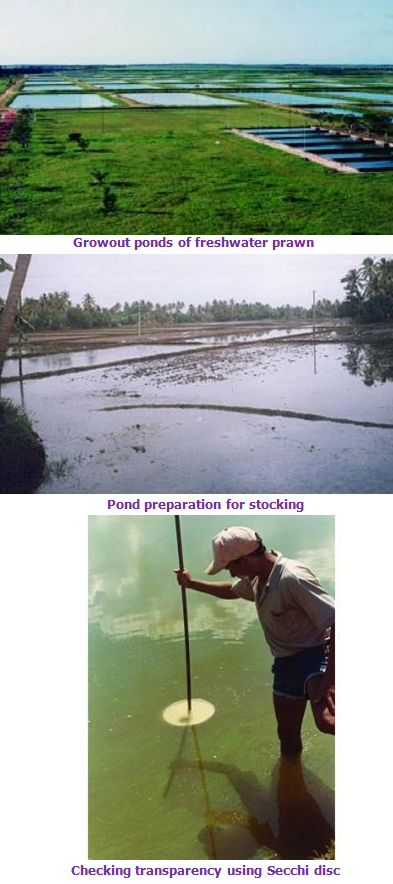
The type of pond preparation to be adopted before stocking is based on the type of culture and its intensity and nature of the culture pond. Liming of the pond assumes great importance than in the case of freshwater fish culture. The application of fertilisers is restricted in case pelletised feed is used. However, occasionally cow dung, single super phosphate, urea etc. can be applied on assessing the productivity.
The stocking density normally varies from 4000 to 50000 PL/ha depending on the type and intensity of the management practices. The culture system may be monoculture or polyculture with carps. In case of polyculture with carps the more pond depth is preferred at 4-5 feet. In case of polyculture the stocking density of prawn may vary from 2500-20000 post larvae. The carp fingerlings may be of the order of 500-2500 nos. Nursery may be incorporated where the post larvae obtained from hatcheries could be reared for a period of 4-5 weeks till they attain 40-50 mm or 1-3 gm.
In order to get desired production, feeding, aeration, water exchange, periodic monitoring should be continued. The quality and type of feed is based on culture system. Macrobrachium with its omnivorous feeding habits can make use of a variety of feeds from common wet feed made from rice bran and oil cake to scientifically formulated pelleted feed. The rate of feeding is determined by the stage of growth of prawn, water quality, density of stock and other manuring practices. Generally the feeding rate my be 5% of the body weight.
In order to get desired production, feeding, aeration, water exchange, periodic monitoring should be continued. The quality and type of feed is based on culture system. Macrobrachium with its omnivorous feeding habits can make use of a variety of feeds from common wet feed made from rice bran and oil cake to scientifically formulated pelleted feed. The rate of feeding is determined by the stage of growth of prawn, water quality, density of stock and other manuring practices. Generally the feeding rate my be 5% of the body weight.
The duration of culture varies from 6 to 12 months depending on the type of culture practice. Generally in monoculture the culture period may be 6-8 months under monoculture and 8-12 months under polyculture. The average growth of prawn may range from 50 gms to 200 gms depending on the duration, density, water quality, feeding etc. The survival rate may range 50% to 70% depending on the type of management practices.
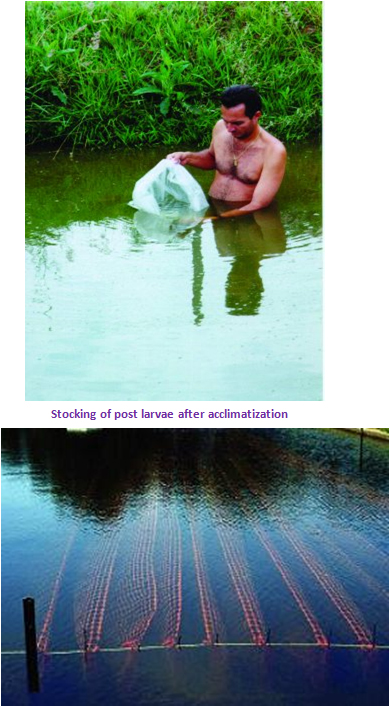
Basically there are three different farming techniques used for Macrobrachium rosenbergii :
A) Extensive Freshwater Prawn Culture
Extensive culture means rearing in ponds (but also in other impoundments such as reservoirs, irrigation ponds and rice fields), which produce less than 500 kg/ha/yr of freshwater prawns. They are stocked, often from wild sources, with PL or juveniles at 1-4/m2 . There is no control of water quality; the growth or mortality of the prawns is not normally monitored; supplemental feeding is not normally supplied; and organic fertilisation is rarely applied.
B) Semi-Intensive Freshwater Prawn Culture
Semi-intensive systems involve stocking PL or juvenile freshwater prawns (usually from hatcheries) at 4-20/m2 in ponds, and result in a range of productivity of more than 500 kg/ha/yr and less than that defined as intensive in this box. Fertilisation is used and a balanced feed ration is supplied. Predators and competitors are controlled and water quality, prawn health and growth rate are monitored. This form of culture is the most common in tropical areas.
C) Intensive Freshwater Prawn Culture
Intensive culture refers to freshwater prawn farming in small earth or concrete ponds (up to 0.2 ha) provided with high water exchange and continuous aeration, stocked at more than 20/m2 and achieving an output of more than 5000 kg/ha/yr. Construction and maintenance costs are high and a high degree of management is required, which includes the use of a nutritionally complete feed, the elimination of predators and competitors, and strict control over all aspects of water quality. This form of culture is not recommended in this manual because it requires more research, particularly on size management.
Based of the management practice employed there are four different management systems being adopted for freshwater prawn farming in India.
System 1: The Continuous System
This involves regular stocking of PL and the culling (selective harvesting) of market sized prawns. There is no definable ‘cycle' of operation and the ponds are therefore only drained occasionally. One of the problems of this form of culture, which can only be practiced where there is year-round water availability and its temperature remains at the optimum level, is that predators and competitors tend to become established. Also, unless the culling process is extremely efficient, large dominant prawns remain and have a negative impact on the postlarvae, which are introduced at subsequent stocking occasions. This results in a lower average growth rate. The decline in total pond productivity (yield) that has been observed when this system has been used for a long time is, however, not confined to this management system and may also be a function of genetic degradation, as discussed elsewhere in this manual. This results in less and less satisfactory animals being stocked.
System 2: The Batch System
At the other extreme to the continuous system is the batch system, which consists of stocking each pond once, allowing the animals to grow until prawns achieve the average market size, and then totally draining and harvesting it. This reduces predator and competitor problems. However, the problem known as Heterogeneous Individual Growth (HIG) remains. This term (HIG) refers to the fact that freshwater prawns do not all grow at the same rate. Some grow much faster, tend to become dominant, and cause stunted growth in other prawns.
System 3: The Combined System
This provides the advantages of reduced predator and competitor problems of the batch system with the cull harvesting employed in the continuous system, to reduce the problems of HIG. In the combined system, ponds are stocked only once. Cull harvesting starts when the first prawns reach market-size (the exact size depends on the local, live sales, or export market requirements). This removes the fast-growing prawns for sale, leaving the smaller ones to grow, with less HIG impact. Eventually, after several cull-harvests, the ponds are drained and all remaining prawns harvested. The total cycle usually lasts about 9-12 months in tropical regions, depending on local conditions. This system is recommended in this manual.
System 4: The Modified Batch System
This is a more complex management regime involving three phases. After 60-90 days in a 1000 m2 nursery pond stocked at 200 to 400 PL/m2, 0.3-0.5 g juveniles were harvested and stocked at 20 to 30/m2 empty ‘juvenile' ponds. After another 2-3 months, seine harvesting of these juvenile ponds begin and this is repeated every month. These harvests removed animals of 9 to 15 g, which were then stocked into ponds with existing populations of small prawns. The juvenile ponds were themselves then either converted to adult ponds, to allow remaining animals to grow to marketable size, or were drained and refilled for further use. Further advantages is obtained if post larvae are held longer in the nursery ponds and then graded into at least two size groups before stocking into juvenile ponds.
Ponds need to be well maintained during the farming period. Special care should be taken for prevention and treatment of pond bank erosion and the maintenance of water inlet and outlet structures, particularly the filters. Pond surface area can be increased by placing rows of netting, suspended from floaters and weighed down with sinkers, across the pond. Without using substrates to increase productivity, a stocking rate of about 4 juveniles/m2 (40 000/ha) is recommended for the monoculture of Macrobrachium rosenbergii in temperate zone ponds. There are some advantages in using larger juveniles for stocking. For example, it has been demonstrated that increasing the average stocking weight at 4 animals/m2 from 0.17 g to 0.75 g increases production at harvest by nearly 30%. However, this stocking size advantage does not apply indefinitely; research has shown that stocking 3 g animals did not improve production because the animals matured too rapidly.
Grading nursed juvenile prawns before stocking also has significant advantages. In temperate zones it has been found to increase average harvest size and total pond production. Size grading is a way of separating out the faster growing prawns and lowering the suppression of growth that they cause to other prawns; it can also result in improved feed conversion ratios (FCR). These types of management make prawn production feasible in smaller, deeper ponds, which were previously considered unsuitable.
Polyculture Culture
Farming Macrobrachium species in combination with single or multiple species of fish, including Tilapias, Common carp, Chinese carps, Indian carps, Ornamental fish etc are common. The inclusion of freshwater prawns in a polyculture system almost always has synergistic beneficial effects, which include:
• More stable dissolved oxygen levels;
• The reduction of predators;
• Coprophagy (the consumption of fish faeces by prawns), which increases the efficiency of feed;
• Greater total pond productivity (all species); and
• The potential to increase the total value of the crop by the inclusion of a high-value species.
• The reduction of predators;
• Coprophagy (the consumption of fish faeces by prawns), which increases the efficiency of feed;
• Greater total pond productivity (all species); and
• The potential to increase the total value of the crop by the inclusion of a high-value species.
Prawn-fish polyculture systems are therefore normally batch-harvested. The addition of prawns to a fish polyculture system does not normally reduce the quantity of fish produced. On the other hand, the addition of fish to a prawn monoculture system markedly increases total pond yield but may reduce the amount of prawns below that achievable through monoculture.
Integrated culture
The wastewater from ponds containing prawns being reared in monoculture or polyculture with fish can be used for the irrigation of crops. Prawns can also be reared in paddy fields, without depressing rice production. The introduction of freshwater prawns reduces the area devoted to rice paddy (because deeper areas where prawns can shelter when the rice field is dry have to be provided). It also reduces weeding costs (prawns eat weeds) and fertilization costs.
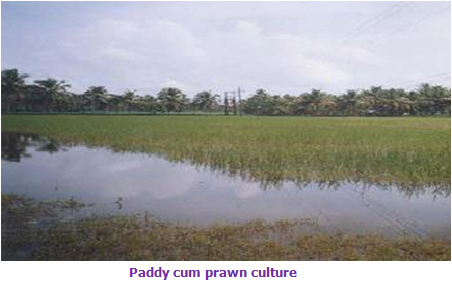
It is necessary to maintain an adequate phytoplankton density, to provide cover and control the growth of weeds in freshwater prawn ponds. This is done by encouraging the growth of phytoplankton. However, it is often unnecessary to fertilize, because this is rapidly achieved by the feeding regime. However, ponds built in a sandy-clay soil may require fertilization for this purpose. Where necessary, 25 kg/ha/month of triple superphosphate will keep the water green. Benthic fauna are very important features in the ecosystem of freshwater prawn ponds, forming part of the food chain for prawns. Fertilisation to encourage the development of benthic fauna is therefore recommended. Animal manures have been used for this purpose (e.g. 1000-3000 kg/ha of cattle manure).
The types of feed used in freshwater prawn farming vary widely and include individual animal or vegetable raw materials and feed mixtures prepared at the pond bank; both of these are generally referred to as ‘farm-made feeds'. In addition, commercial feeds designed for freshwater prawns are available. Freshwater prawns are omnivores and, so far as is known at present, their nutritional requirements are not very demanding. Some farmers utilize commercial feeds designed for marine shrimp in freshwater prawn nurseries or during the first few weeks of the grow-out phase when prawns are stocked as PL. Marine shrimp feeds have a much higher protein content than is needed for freshwater prawns, so cheaper commercial feeds that have either been specifically designed for freshwater prawns or for a species of fish (e.g. catfish) must be used in grow-out ponds stocked with nursery-reared juveniles, or substituted as soon as possible in those stocked with PL. The prawns are fed daily with formulated pellet diet (2-3 mm size) @ 10% of the biomass initially and then reduced to 3% of the biomass towards the end of the culture period.
Many different ingredients could be used in your farm-made feeds, either individually or combined into ‘compound feeds'. Commercial feeds for freshwater prawns tend to use ingredients, which are available in large quantities; many of them are global commodities, such as fish meal or soybean meal. In addition to ‘trash' fish, molluscs and prawn wastes form valuable animal protein sources. Pond water stands at risk of pollution if individual raw materials (not made into a mixed and bound compound feed), especially with wet materials (such as trash fish and beef liver) are used. Compounded feeds, especially when they are water-stable, cause less problems of this type. Compounded chicken and pig feeds, either unmodified, or re-extruded through a mincer with trash fish or prawn meal, have been used in freshwater prawn farming.
Feed formula for Freshwater prawn
Ingredients | Feed 1 (%) | Feed 2 (%) |
Fishmeal | 20 | - |
Shrimp Head meal | - | 30 |
Soya meal | 9 | 5 |
Rice bran | 45 | 35 |
Coconut oil cake | 20 | 20 |
Tapioca starch | 5 | 9 |
Mineral premix | 1 | 1 |
Total | 100 | 100 |
(Source: Food and Agriculture Organisation, 2002)

There can be no exact general recommendation for daily feeding rates, because these depend on the size and number of prawns (and, in a polyculture system, fish) in the pond, the water quality, and the nature of the feed. The feed should be broadcasted in the pond as mentioned above. Spread the feed around the periphery of the pond in the shallows, which are good feeding zones. Check trays 3-4 nos may be kept in different corners of the pond to check the consumption of food.

Health, Predation and Disease
Continuous exchange of a small proportion of the water is the normal way of maintaining good water quality. However, some farmers change water more suddenly every two weeks, and in much larger proportions, because this tends to make the prawns moult. The more that moult (and are therefore soft-shelled) at the same time, the less potential losses there may be due to cannibalism. Low dissolved oxygen should be suspected if prawns begin to crawl out of the ponds or congregate at the edges of the pond in daylight. If this problem occurs, flush the pond. Very high pH levels in freshwater prawn ponds can cause prawn mortalities, both because of the direct effect of the pH itself and because of the greater solubility of waste ammonia at high pH. High pH is often caused by dense phytoplankton blooms.
Major problems that may arise during culture are mortality of the stock due to low dissolved oxygen in the pond water. Heavy plankton bloom, very low water level and lack of water exchange leads to low dissolved oxygen levels. Continuous rainy/cloudy days precipitate this problem. Immediate water exchange or aeration of ponds during night hours prevents this problem. Development of bottom algae due to high transparency of water is another problem during monoculture of prawns. To avoid this problem always maintain transparency in 30-40 cm range by frequent fertilization. Predation is one of the greatest problems for any aquaculture enterprise, including freshwater prawn farming. Predation is caused mainly by other aquatic species, birds, snakes and humans. Normally, insects (mainly dragonfly nymphs), carnivorous fish and birds are the most serious predators in freshwater prawn farming.
Major diseases known to affect freshwater prawns, and their symptoms
Virus Diseases | Bacterial and Rickettsial Diseases | Fungal Diseases |
Macrobrachium hepatopancreatic parvo-like virus (MHPV) None , Not associated with significant morbidity or mortality. | Black spot (sometimes called brown spot or shell disease) One or many melanized lesions on the cuticle; often caused by opportunistic bacteria which enter following physical damage; problem may disappear at the following moult but sometimes develops into deep spreading lesions; reduces marketable value of harvested prawns. | Lagenidium infection Affects larvae: an extensive mycelial network can be seen through the exoskeleton; can decimate hatchery populations within 24 hours. |
Macrobrachium muscle virus (MMV) Muscle tissues become opaque, followed by necrosis; occurs within 10 days of stocking PL and may cause upto 50% mortality. | Appendage necrosis Larval appendages become necrotic and melanized; affected larvae do not eat and may become bluish in colour; may be associated with a heavy surface burden of the filamentous bacterium Leucothrix. | Infections by Fusarium and Saprolegnia Cause necrosis and melanization; follow physical damage. |
White spot syndrome baculovirus (WSBV) Targets the cuticular epidermis, stomach, gills and hepatopancreas; important disease in marine shrimp; Macrobrachium is known to be a carrier but it is not yet certain whether WSBV causes mortalities in it. | Internal infections Caused by a variety of Gram negative bacteria such as Vibrio spp. and Aeromonas spp.; feeding discontinues; discolouration of the body (usually pale and white) occurs; animals listless; infections by luminous vibrios are usually serious. | Yeast infections Muscles appear yellowish, bluish or grey; causes heavy mortalities in grow-out ponds; particularly prevalent when temperatures are lower than optimal and organic matter is allowed to accumulate and eutrophication occurs. |
Nodavirus (M R NV) Opaque whitish appearance of the abdomen, followed by severe mortalities. | Bacterial infection caused by Enterococcus Necrosis in muscles and hepatopancreas; begins in the head portion and proceeds to the tail; animal appears opaque; exacerbated in high temperature (33-34°C) and high pH (8.8-9.5) conditions. Rickettsial disease Larvae become white throughout their bodies and generally inactive before death; infected populations experience significant mortalities. |
(Source: Food and Agriculture Organisation, 2002)
Prevention and Treatment of freshwater prawn diseases
| Disease | Prevention and Treatment |
Macrobrachium hepatopancreatic parvo-like virus (MHPV) | Obtain and maintain disease-free stock; good management. No treatment reported. |
Macrobrachium muscle virus (MMV) | Obtain and maintain disease-free stock; good management. No treatment reported. |
White spot syndrome baculovirus (WSBV) | Obtain and maintain disease-free stock; good management. No treatment reported. |
Nodavirus (M R NV) | Obtain and maintain disease-free stock; good management. No treatment reported. |
Black spot (sometimes called brown spot or shell disease) | Good management, especially maintaining good water quality and avoiding physical damage by handling (by transfer, sampling) or by other prawns (may be caused by overstocking, poor feeding, etc.). Treatment by immersion in 10 ppm oxolinic acid for 1 hour, or 2 ppm nifurpirinol for 96 hours reported. |
Appendage necrosis | Good management, especially maintaining good water quality and avoiding physical damage by handling (by transfer, sampling) or by other prawns (may be caused by overstocking, poor feeding, etc.). Treatment by 0.65-1.0 ppm erythromycin or 2 ppm of a penicillin-streptomycin mixture, or 1.5 ppm chloramphenicol reported. |
Internal infections | Good management, especially good filtration and/or treatment of incoming hatchery water. Treatment by 2 ppm chloramphenicol combined with 2 ppm furazolidone for 5-7 days reported. |
Bacterial infection caused by Enterococcus | Good management, especially by avoiding constructing farms in areas where (or operating farms at times when) temperature and pH are too high. No treatment reported. |
Rickettsial disease | Obtain and maintain disease-free stock; good management; treatment of tanks and equipment with lime (CaO) before stocking. Treatment by application of 10 ppm oxytetracycline combined with 10 ppm furazolidone reported. |
Lagenidium infection | Good management. Treatment by maintaining 10-100 ppb trifluralin in hatchery tanks, or treatment with 20 ppm of Merthiolate ® has been reported. |
Infections by Fusarium and Saprolegnia | Good management, especially maintaining good water quality and avoiding physical damage by handling (by transfer, sampling) or by other prawns (may be caused by overstocking, poor feeding, etc.). No treatment reported. |
Yeast infections | Good management, especially the avoidance of lower than optimal water temperatures, the accumulation of organic matter and eutrophication; use better water exchange, aeration and circulation and lower feeding rates. No treatment reported. |
(Source: Food and Agriculture Organisation, 2002)
Basically there are two methods of harvesting: cull-harvesting drain harvesting. Harvesting time depends partly on growth rate and the size of animals you want to sell. This, in turn, depends on your market requirements. It also depends on the pond management technique chosen. Cull-harvesting is used to harvest market-sized animals from the pond at intervals and removes the faster growing prawns. In tropical ponds cull-harvesting usually starts 5-7 months after PL have been stocked, or sooner if juveniles have been stocked. After cull-harvesting commences, you should totally seine each pond once per month or partially seine it twice per month (i.e. seine half the pond twice per month or all of it once per month). Take out the market-sized animals and sell them. Keep the smaller ones and soft-shelled animals in the pond for further growth. After about 8-11 months, drain the pond and sell the whole harvest.
Cull Harvesting
In this technique a seine net is pulled through the pond to remove market-sized animals. The net may be a simple seine or one constructed especially for the purpose, usually made of monofilament nylon, and provided with floaters, sinkers and sometimes a bag. The size of the seine you use depends on the size of pond you are using it for. Nets which are 2.5 m high with a length equivalent to 1.6 times the pond width are suggested. The mesh you choose depends on the size of animal to be marketed. Although stretched knot mesh sizes of as low as 0.7 inches (1.8 cm) are sometimes used where there is a market for small prawns, the usual recommended mesh size is 1.5-2 inches (3.8-5 cm).
Care must be taken to ensure that the bottom of your seine is kept on the bottom of your pond. If you do not, many prawns will escape beneath it. Preferably you should pull the seine down the long axis of the pond (this is why rectangular ponds of 30 m maximum width are preferred) so that the ends of the net are pulled along the banks of the pond. Seining different halves of the pond once every two weeks avoids disturbing the whole of the pond at once.
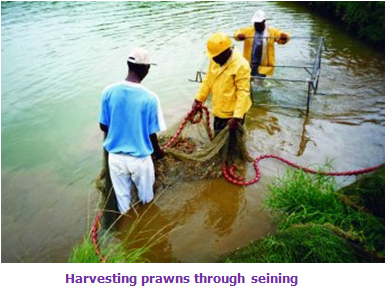
Drain Harvesting
The method and efficiency of drain harvesting depends on the design of the pond. As with any other method of harvesting, speed is important and harvesting should start very early in the morning while the temperature is cool. You can partially draw down the pond water level during the night before harvesting commences.
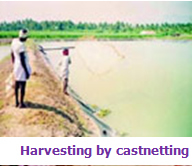
In general, the value of harvested product depends on its quality. Speed during and after harvesting, getting the prawns on ice and out of the sun, and care in handling to prevent physical damage, will all reap valuable dividends.
Handling prawns to be sold fresh
If you intend to sell your prawns fresh (instead of selling them alive or frozen) you will need to keep them very cool. You should not place live prawns straight onto ice; this results in a slow decline in body temperature, causes stress, and accelerates the deterioration process, which occurs after death. To kill a batch of 50 kg of prawns, for example, immerse them in 50 l of water and 80 kg of ice for 30 minutes. Finally, you should wash them in chlorinated water (5 ppm active chlorine). After killing, remove prawns from the cold water and immediately place them in isothermal boxes, with alternate layers of ice and prawns, placing ice in the first and last layers.
Handling prawns to be sold frozen
If prawns are to be sold within 5 days of harvest, which is considered to be their maximum practical refrigerated shelf life, freeze them immediately. Freezing at temperatures below -10°C is essential; storage at -20°C or below is recommended; storage at -30°C is ideal. To avoid physical damage to the muscle structure of the prawns, it is recommended that the freezing temperature passes from -1°C to -5°C as rapidly as possible (not more than 2 hours). This decreases the production of ‘drip' (leak) at the moment of thawing, and keeps the prawns looking and tasting the same as before freezing. If you freeze them more slowly, it will cause large ice crystals to form between the cells of the animals and increase ‘drip'. Keeping prawns frozen on-farm is generally not good practice, except on very large farms where specialist equipment has been installed.

Marketing prawns alive will usually generate a better price but, it also increases handling costs. Marketing them successfully in this way depends on the ability to keep them alive during transport and display, and to present undamaged, healthy prawns in an attractive way.
Marketing your freshwater prawns fresh or frozen
Prawns can be sold fresh (chilled) if they are going to be consumed within 5 (preferably 3) days. Prawns, which are not expected to be sold within 3 days, should immediately be frozen. Freezing should take place when they are fresh, not after they have been on ice for several days. Frozen tails have a longer shelf life than whole prawns. Whole frozen freshwater prawns will turn ‘mushy' if they are frozen and held above -20°C, or if they are thawed and refrozen. It is recommended that prawns to be stored for long periods be held at -30 to -35°C. Tails which are frozen in ice blocks may be stored for over a year and still be very satisfactory, although a maximum of six months is recommended. Glazing or vacuum packing significantly prolongs the useful life of frozen prawns. While vacuum packing requires elaborate processing facilities, not available to small farms, glazing is quite simple: a very thin mixture of syrup and water prevents oxidation.
Economics
The detailed economic analysis of larviculture and farming of freshwater prawn Macrobrachium rosenbergii in India is given in below.
Economics of seed production of M. rosenbergii of 10 million capacity
| Sl. No. | Item | Rs (in lakhs) |
I. | Expenditure | |
A. | Fixed Capital | |
1. | Hatchery site (2000 m 2 @ Rs. 75/ m2) | 1.50 |
2. | Hatchery building (20 x 15 m) | 9.00 |
3. | Construction of office (80 m 2 for seed packing/ laboratory/store) | 2.40 |
4. | Brood stock pond (0.10 ha) | 0.60 |
5. | Larval rearing tanks (RCC, 20 nos of 2.5 MT) | 1.00 |
6. | PL rearing tanks (RCC, 12 nos of 12 MT) | 2.90 |
7. | Water storage tanks | |
Seawater tank (10 x 2.5 x 2 m) | 1.50 | |
Freshwater tank (8 x 2.5 x 2 m) | 1.20 | |
Mixed water tank (8 x 2.5 x 2 m, 3 nos) | 3.60 | |
8. | Artemia hatching unit (200 l, 4 nos) | 0.10 |
9. | Air blowers (2 nos, 5 hp) | 1.00 |
10. | Generator (15 KVA) with accessories | 1.50 |
11. | Water pumps (3 nos for freshwater, seawater and mixed water) | 0.35 |
12. | Water supply /aeration connection | 0.50 |
13. | Electrification | 0.50 |
14. | Bore-well | 0.75 |
15. | Miscellaneous expenditure | 0.60 |
Sub-total | 29.00 | |
B. | Variable cost (for 5 cycle)* | |
1. | Cost of broodstock development | 1.00 |
2. | Cost of transportation of seawater | 0.50 |
3. | Larval feed ( Artemia cysts 200 kg @ Rs. 4000/kg and formulated diets) | 9.00 |
4. | Chemical/medicines | 0.50 |
5. | Electricity | 2.00 |
6. | Wages (1 Manager @ 5000/month and 12 labourers @ 2000/month for 1 year) | 3.48 |
7. | Miscellaneous expenditure | 1.00 |
Sub-total | 17.48 | |
C. | Total Costs | |
1. | Variable cost for 5 cycles | 17.48 |
2. | Depreciation cost on fixed capital at 15% level | 4.35 |
3. | Interest on fixed capital @15% per annum | 4.35 |
Grand-total | 26.18 | |
II. | Gross Income | |
Sale of PL 8 million seed at 80% of hatchery capacity (@ of Rs. 500/1000 nos) | 40.00 | |
III. | Net Income (Gross income- Total cost) | 13.82 |
* The capital requirement for variable cost may be only 25-30% of the above shown amount, as the income from sale of post-larvae after one cycle may be ploughed back for the subsequent cycles.
(Source: National Bank for Agriculture and Rural Development)
Economics of grow-out production of prawn
Sl. No. | Item | Amount (in Rupees) |
I. | Expenditure | |
A. | Variable Cost | |
1. | Pond lease value | 10,000 |
2. | Prawn seed @ 60,000/ha @ Rs. 600 /1000 Nos.including transportation cost | 36,000 |
3. | Fertilizers and lime | 6,000 |
4. | Supplementary feed (pellet form @ 3 t/crop @ Rs. 20/kg) | 60,000 |
5. | Wages (One @ Rs. 2000/month for 9 months) | 18,000 |
6. | Electricity and fuel | 3,000 |
7. | Harvesting charges | 5,000 |
8. | Miscellaneous expenditure | 3,000 |
Sub-total | 1,41,000 | |
B. | Total Cost | |
1. | Variable cost | 1,41,000 |
2. | Interest on variable cost (@ 15% per annum for 6 months) | 10,725 |
Grand total | 1,51,725 | |
II. | Gross Income | |
Sale of big size prawn (@ Rs. 175/kg for 1000 kg) | 1,75,000 | |
Sale of small size prawn (@ Rs. 70/- kg for 500 kg) | 35,000 | |
Grand total | 2,10,000 | |
III. | Net Income (Gross income – Total cost) | 58,275 |
(Source: Central Institute of Freshwater Aquaculture)
For Educational purpose
Ref: http://agritech.tnau.ac.in/fishery/fish_freshwaterprawn.html
FISH BYPRODUCTS:
Fish and fish products are consumed as food all over the world. With other seafoods, it provides the world's prime source of high-quality protein: 14–16 percent of the animal protein consumed worldwide. Over one billion people rely on fish as their primary source of animal protein.
Cod liver oil is a nutritional supplement derived from liver of cod fish. It has high levels of the omega-3 fatty acids, EPA and DHA, and very high levels of vitamin A and vitamin D. It is widely taken to ease the symptoms of arthritis and for other health benefits. It was once commonly given to children, because the high levels of vitamin D in cod liver oil have been shown to prevent rickets.
Depending on the quality of the oil, the flavor and aroma range from a mild sardine-like flavor, to an intense odor of fish and oil. High quality cod liver oil is a pale-yellow, thin, oily liquid, having a slightly fishy and bland taste. Manufacturers sometimes add flavorings, such as citrus or mint essence, to cod liver oil to make it more palatable. While taking the capsules as well as the liquid form, one may experience a very rancid fishy aftertaste during belching.
Cod liver oil was traditionally manufactured by filling a wooden barrel with fresh cod livers and seawater and allowing the mixture to ferment for up to a year before removing the oil. Modern cod liver oil is made by cooking the whole cod body tissues of fatty fish during the manufacture of fish meal.
Uses of Cod liver oil: Cod liver oil is widely taken to ease the pain and joint stiffness associated with arthritis,[ and has also been clinically proven to have a positive effect on heart, bone, as well as helping to nourish skin, hair, and nails.
Cod liver oil and fish oil are similar, but cod liver oil has much higher levels of vitamins A and D. Many adults do not meet the RDA for Vitamin D.
Cod liver oil may be an effective complementary measure for long-term treatment of multiple sclerosis.
Use of cod liver oil during pregnancy is associated with lower risk of Type I diabetes in the offspring. This effect was found only in mothers taking cod liver oil, not in mothers taking multivitamin supplements. Cod liver oil taken by nursing mothers improves the breast milk by increasing the amount of fatty acids, which promotes brain development, and the amount of vitamin A, which helps prevent infections, but the level of vitamin D is unchanged.
A Norwegian study of more than 68,000 women reported that female cancer patients who took daily cod-liver oil supplements had significantly reduced mortality (25% for all cancers, 45% for lung cancer) compared to women who did not take such supplements
Shark liver oil is obtained from sharks that are caught for food purposes and are living in cold, deep oceans. The liver oil from sharks has been used by fishermen for centuries as a folk remedy for general health. It is purportedly useful for healing wounds, sores, irritations of the respiratory tract and the alimentary canal and for lymph node swelling. It is one of the active ingredients in hemorrhoid creams such as Preparation H
Shark liver oil is rich in alkylglycerols, which are naturally found in mother's milk and in bone marrow. It also contains pristane, squalene, vitamins A, D, omega-3 fatty acids, triglycerides, glycerol ethers, and fatty alcohols
Most shark liver oil supplements have not been tested to find out if they interact with medicines, foods, or other herbs and supplements. Even though some reports of interactions and harmful effects may be published, full studies of interactions and effects are not often available. Because of these limitations, any information on ill effects and interactions below should be considered incomplete.
Although many people have taken shark liver oil, the issue of potential toxicity at the usual doses has not been well studied. Some mild digestive problems such as nausea, upset stomach, and diarrhea have been reported. Some animal studies have found that shark liver oil and its components may raise blood cholesterol levels. A Japanese study found some shark liver oil supplements to be contaminated with Polychlorinated biphenyls (PCBs) and Polybrominated diphenyl ethers (PBDEs). PCBs can have harmful effects in humans, and may increase the risk of some types of cancer. People with seafood allergies may also react to shark liver oil.
Relying on this type of treatment alone, and avoiding or delaying conventional medical care, may have serious health consequences.
• Surimi refers to a Japanese food product intended to mimic the meat of lobster, crab, and other shellfish. It is typically made from white-fleshed fish (such as pollock or hake) that has been pulverized to a paste and attains a rubbery texture when cooked.
• Fish glue is made by boiling the skin, bones and swim bladders of fish. Fish glue has long been valued for its use in all manner of products from illuminated manuscripts to the Mongolian war bow.
• Fish oil is recommended for a healthy diet because it contains the omega-3 fatty acids, eicosapentaenoic acid (EPA), and docosahexaenoic acid (DHA), precursors to eicosanoids that reduce inflammation throughout the body.
• Fish emulsion is a fertilizer emulsion that is produced from the fluid remains of fish processed for fish oil and fish meal industrially.
• Fish hydrolysate is ground up fish carcasses. After the usable portions are removed for human consumption, the remaining fish body – guts, bones, cartilage, scales, meat, etc – are put into water and ground up.
• Fish meal is made from both whole fish and the bones and offal from processed fish. It is a brown powder or cake obtained by rendering pressing the whole fish or fish trimmings to remove the fish oil. It used as a high-protein supplement in aquaculture feed.
• Fish sauce is a condiment that is derived from fish that have been allowed to ferment. It is an essential ingredient in many curries and sauces.
• Isinglass is a substance obtained from the swim bladders of fish (especially sturgeon), it is used for the clarification of wine and beer.
• Tatami iwashi is a Japanese processed food product made from baby sardines laid out and dried while entwined in a single layer to form a large mat-like sheet.
• Pearls, mother-of-pearl, and abalone are valued for their lustre. Traditional methods of pearl hunting are now virtually extinct.
• Sea horse, star fish, sea urchin and sea cucumber are used in traditional Chinese medicine.
• The Sea snails Murex brandaris and Murex trunculus are used to make the pigment Tyrian purple.
• Some sepia pigment is made from the inky secretions of cuttlefish.
• Kelp is a major source of iodine, can be used as fertilizer, and kelp ash can be used in soap and glass production.
• Fish may also be collected live for research, observation, or for the aquarium trade.
Source of information http://en.wikipedia.org
PRAWN Culture
Prawn Culture
1. Introduction
Over the years, aquaculture in India has evolved from a subsistence and backyard activity to that of a technology driven commercial and profitable venture. India is now second in world aquaculture production next to China.
The success of commercial aquaculture in India is attributed to the availability of vast untapped surface water resources, standardisation of many new production and associated techniques of input and output subsystems, extension of technology and practical knowledge to the farmers through the State/Central Government agencies/organisations (i.e. FFDAs, ICAR research institutes, KVKs etc.), setting up of norms for institutional finance for aquaculture and refinance to banks by NABARD, provision of adequate credit by financial institutions, etc.
Although India has vast freshwater resources in the form of ponds and tanks (2.35 million ha), reservoirs (3.15 million ha), lakes and derelict water bodies (1.3 million ha), rivers and canals (1,97,024 km), low lying waterlogged areas etc., these are not fully exploited except for culture of carps in a limited scale. Composite fish culture of Indian Major Carps i.e. Catla, Rohu and Mrigal has become very popular in large number of tanks and ponds in the country. After the setback to brackish water shrimp farming in mid nineties and consequent regulations on expansion and intensification of the activity, farmers in both coastal and land locked States have gone for large scale farming of Giant Freshwater Prawn (Macrobrachium rosenbergii) popularly called "Scampi" which is having high demand in both domestic and international markets. In order to meet the raw material requirement of large number of processing units established for export and also to meet the domestic demand, there is urgent need for promotion of sustainable production of Scampi in vast untapped fresh water resources of the country to ensure livelihood to poor people in rural areas and also the much needed food security.
Scampi is indigenous in the whole of the South and Southeast Asian countries as well as in Northern Oceania and in Western Pacific Islands. Among all the fresh water prawns, Scampi grows faster and is the largest known species. The major producers of Scampi in the world are China, India, Bangladesh, Brazil, Thailand, Taiwan, Ecuador and Malaysia. Scampi is found in all the major rivers and lakes, which are connected to the sea. In the natural habitat, it grows to a maximum size of 750 gram.
2 Scope for Fresh Water Prawn Farming
The capture of shrimp from marine resources has dwindled over the years due various reasons viz:- large size of fishing fleet, inadequate conservation and management measures, pollution etc. The farming of tiger shrimp in coastal brackish water areas has come down and now limited areas are being taken up with low stocking density, feeding and crop holidays. Further, of late, the international price fluctuations of tiger shrimp has also enlarged the scope for Scampi farming, which is less vulnerable to disease and price fluctuations unlike tiger shrimp. Thus considering the high export potential and domestic demand, the Giant Fresh Water Prawn (Macrobrachium rosenbergii) "Scampi", enjoys immense potential for culture in India. Over 5.5 million ha of impounded freshwater bodies in various States of India, offer great potential for culture of Scampi. The commercial farming of Scampi started in 1999. It is now farmed in all the coastal states and also in the states of Punjab, Haryana and Tripura due to standardisation of seed production technology. The leading states in terms of area under production and productivity for Scampi are Andhra Pradesh, Orissa, Kerala and West Bengal. The state of Andhra Pradesh accounts for more than 50 per cent of the cultured Scampi production and also in terms of area under culture. Being a hardy and fast growing species among the fresh water prawns, Scampi is suitable for culture in all types of fresh water and also in low saline water bodies. It can be cultivated through monoculture in existing as well as new ponds or with compatible freshwater fishes in existing ponds. The EEC countries, UAE, Japan, Canada, USA are the major markets for Scampi in frozen, IQF forms etc. Since the world market for Scampi is expanding with very high and constant prices compared to tiger shrimp, there is great scope for increasing Scampi production and export.
3 Technical Requirements
The Giant Freshwater Prawn "Scampi" is suitable for cultivation in tropical and subtropical climates. It accepts supplementary pelleted feed readily. In the natural environment, lower reaches of rivers, tidal inlets, where water is directly or indirectly connected with sea are their preferred habitat, specially during spawning. The breeding takes place in low saline estuarine water, which is also needed for larval and post larval development after incubation. A large number of Scampi hatcheries for supply of seed (post larvae) is established in many states viz: Andhra Pradesh, Kerala, Tamilnadu, Orissa etc. Even, many shrimp hatcheries in coastal states have diversified into production of Scampi seeds due to less demand for tiger shrimp seed.
The technical requirements for establishment of fresh water prawn farm and its successful operation are briefly described in the following paragraphs. The parameters are averaged out and the costs are only illustrative.
3.1 Site Selection
Careful selection of suitable site for fresh water prawn farming is an essential pre-requisite for successful farming operation. The site selection plays an important role as the entire management aspect of the farm ultimately depends on specific conditions of the site. The aspects to be considered for site selection are climatic conditions (temperature, quantum and seasonality of rainfall, evaporation, sunlight, wind speed etc.), soil type, availability of water, approach roads etc. The area should be free from pollution and flooding. Flat or slight sloping lands are the most ideal sites. Low-lying lands, waterlogged areas, salinity and alkalinity affected areas could be effectively used for construction of Scampi farms. Other considerations like drainage facility, availability of skilled and unskilled manpower, electric power supply etc. have also to be taken into account while selecting a suitable site.
3.2 Soil Quality
The ideal soil for Scampi farming should be clay silt mixture or sandy loam comprising of 60 per cent sand and 40 per cent silt with good water retention capacity. Acid sulphate soils should be avoided for freshwater prawn farming. The detailed optimal soil quality parameters required for fresh water prawn farming are given in Annexure I.
3.3 Water Quality
The availability of quality and quantity of water is a critical factor in selection of suitable site. There should be abundant and good quality water available at the farm site. The water should be free from any kind of pollution. The pH of water should be of 7.0 to 8.5. The water temperature should range from 18 0C to 34 0C, with an optimum range of 28 0C to 31 0C. Dissolved oxygen content of water should be 3 to 7 ppm. The detailed optimal water quality parameters required for fresh water prawn farming are given in table
Optimal soil and water quality requirements for Fresh water Prawn Culture
3.4 Pond Construction
Rectangular ponds are suitable from the harvesting point of view. A convenient width of pond is 30 m, whereas length of the pond depends on site, topography and farm layout. Normally, a pond size of 0.2 to 0.6 ha is suitable. The average depth of the pond should be 0.9 m, with a minimum of 0.75 m and a maximum of 1.2 m. The information on maximum water level during flood and minimum water level during drought in the area surrounding the proposed farm site may be required to decide the height of the bund and depth of excavation. The internal and external slopes of the bunds may be kept atleast 2.5 :1. Bunds must have a freeboard of at least 60 cm above the highest water level in the pond. The top width of bunds should be minimum of 1 m. The bottoms of grow-out ponds needs to be sloped towards the drainage point. The drainage system should be designed carefully to prevent mixing of outlet water with incoming water. Designing and layout of the farms may also be done keeping in view the water intake and water outlet facilities.
3.5 Water Supply and Drainage
Appropriate water supply and drainage systems have to be designed keeping in view the water source and topography of the area. The ponds constructed should be easy to drain out the water. Ground water is preferable for filling the ponds as it is free from pollution but it should be supplied to ponds above water level for improving oxygen content. In case, canal water to be used is free from pollution, due care should be taken to provide adequate micro filters for removing the eggs and larvae of fishes especially omnipresent Tilapia spp. A tubewell of suitable depth and pumping system is required for periodic water supply into the pond/exchange of water. Water relpenishment/exchange on weekly or fortnightly basis as required is desirable and provisions are to be made accordingly.
4 Farm Management
The type of pond preparation to be adopted before stocking is based on the type of culture and it's intensity and nature of the culture pond. The pond bed should be dried for minimum of 10 days, limed, ploughed thoroughly for removing the harmful gases, killing of parasites etc. Liming increases the availability of soil nutrients and also neutralises the pH of soil. Liming of the pond assumes great importance in Scampi culture than in the case of freshwater fish culture. The application of fertilisers is restricted in case pelleted feed is used. However, occasionally cattle dung, single super phosphate, urea etc. can be applied on assessing the productivity.
The stocking density normally varies from 4,000 to 50,000 nos. of post larvae per ha depending on the type and intensity of the management practices. The culture system may be monoculture or polyculture with carps. In monoculture ponds, average water depth of 0.9 m is maintained. In case of polyculture with carps, the pond depth is preferred at 4 to 5 feet. In case of polyculture, the stocking density of prawn may vary from 2,500 to 20,000 post larvae per ha and the surface feeding carp fingerlings may be of the order of 250 to 5000 nos. per ha. The post larvae obtained from hatchery may be grown to juvenile stage in a separate nursery pond for a period of 45 to 60 days till they attain 40 to 50 mm or 1-3 gram. With separate nursery rearing facility, juveniles can be graded sex and size wise and cultured separately in grow-out ponds for maximising production. The post larvae may also be stocked directly in grow-out ponds.
In order to get desired production, feeding with formulated feed, regular fresh water replenishment, water quality monitoring specially pH, dissolved oxygen and hardness, control of excess algal bloom, periodic monitoring of feeding behaviour should be continued. Feed is a critical and important input in fresh water prawn farming. The quality and type of feed is based on culture system. Scampi with its omnivorous feeding habit can make use of a variety of feeds from common wet feed made from rice bran and oil cake to scientifically formulated pelleted feed. The frequency of feeding may be atleast 2 to 3 times a day i.e. morning and evening. The rate of feeding is determined by the stage of growth of prawn, water quality, density of stock and other manuring practices. For nursery phase, the starter feed as given in Tiger shrimp is provided. Generally the feeding rate is higher the per cent of body weight during the nursery phase to as low 2 to 5 per cent of the body weight during grow-out phase. The feeding may be reduced during molting stage as animals take less food. Hide outs like earthen pipes, palm/coconut leave bunches may be provided in different locations of ponds to reduce cannibalism. The sampling of population in grow-out ponds is required to arrive at the daily quantum of feed.
The duration of culture varies from 6 to 12 months depending on the type of culture practice. Generally, the culture period may be 6 to 8 months under monoculture and 8 to 12 months under polyculture. The average growth of prawn may range from 50 to 200 g depending on the duration, density, water quality, feeding etc. The survival rate may range 70 to 80 per cent depending on the management practices.
In case of Scampi, male animals show uneven growth which is known as Heterogeneous Individual Growth (HIG). There are three different sizes of males in a population during culture. The smallest and first stage of male is called "small male" (SM) having short, nearly translucent claws. These small males grow into second stage called "orange claws" (OC), which have large orange claws. OC males later may transform into the third and final stage, the "blue claw" (BC) males. The blue claw males are required to be harvested periodically as the presence of blue-claw males inhibits the growth of smaller males, and delays the development of OC males into blue-claws. The management of size variations of males is an important aspect of Scampi culture. For optimum production, the females and males may be cultured in separate ponds after nursery phase as the blue clawed males are required to be culled periodically from the grow-out pond. In case of both male and female prawns to be grown in the same pond, the stocking density of females may be controlled and large size blue clawed males are culled regularly to reduce the problem of HIG and to get higher production.
CARP Culture
Carp Culture (Fish Culturing in Ponds)
Types of commercial Carps
Carps have been the mainstay of culture practice in India and it is the three Indian major carps viz., catla, rohu and mrigal together with three other exotic carps viz., silver carp, grass carp and common carp contribute over 85% of the aquaculture production of the country.
The technological interventions during last three decades have led to increase the mean national production levels in ponds and tanks from about 600 kg/ha to over 2,000 kg/ha. Higher production levels of 6-8 tonnes/ha/year are being achieved by several farmers and entrepreneurs in states like Andhra Pradesh, West Bengal, Punjab and Haryana. Several combinations of culture practices have been evolved in the country to suit the fish species, water resources, availability of fertilizer, feed resources, etc. and also the investment potentials of the farmers. Carp culture is shown to be highly compatible with other farming practices and also possesses high potential for recycling of organic wastes.
Carp Polyculture
Carp polyculture in India have been utilizing a huge amount of organic wastes such as cowdung or poultry droppings and production levels of 1-3 tonnes/ha/year can be obtained with application of both organic and inorganic fertilizers alone. Provision of feed enhances the fish production significantly and production levels of 4-8 t/ha/yr are obtained using a judicious combination of both the feed and fertilizers.
The packages of practices, as developed at the research institute have been adopted in ponds ranging from 0.04-10.0 ha in area and 1-4 m in depth in different regions of the country, resulting varying rates of production. While small and shallow stagnant ponds have several inherent problems, which adversely affect the growth of fish, the large and deep ponds have their own problems of management. Ponds of 0.4-1.0 ha in size with water depth of 2-3 m are considered to be best for better management. The management practices in carp polyculture involve environmental and biological manipulations, which can be broadly classified as pre-stocking, stocking and post-stocking operations.
Pre-stocking Pond Preparations
Pond preparation involves making ponds weed and predator-free and generating adequate natural food to ensure high rates of survival and good growth and thereby yields. Control of aquatic weeds, removal of undesirable biota and improvement of soil and water quality are the important aspects connected with this phase of management. The detail regarding the control of predatory and weed fishes have been discussed in nursery management.
Stocking of Ponds
Ponds are stocked with seed of appropriate size after acclimatizing them to the new habitat when it is ready after fertilization. Both size and density of fish are important to achieve high yields. Fingerlings of over 100 mm in size are recommended for stocking in grow-out culture ponds. Stocking of smaller size of fishes may result in higher mortalities and slow growth during the initial months. In intensive polyculture ponds, a size of 50-100 g is preferred for stocking to realize higher survival of over 90% and better growth. Generally, a density of 5,000 fingerlings is kept as a standard stocking rate per ha for carp polyculture for a production target of 3-5 t/ha/yr. Stocking densities of 8,000-10,000 fingerlings/ha has been used for production levels of 5-8 t/ha/yr. Higher targeted fish production levels of 10-15 t/ha/yr are achieved by resorting to stocking at a density of 15,000-25,000/ha. In carp polyculture, species ratio are maintained for minimizing the inter-specific and intra-specific competition for food available at various trophic levels and zones in a pond. Two or more species occupying different niches could be utilized in a pond for exploiting the food available at various zones. While a combination of six species viz., catla, silver carp, rohu, grass carp, mrigal and common carp has been proved to be the ideal combination for carp culture in India, species combination largely are decided on seed availability and market demand. Of these catla and silver carp are surface feeders, rohu is a column feeder, grass carp is a macro-vegetation feeder, and mrigal and common carp are bottom feeders. A proportion of 30-40% surface feeders (silver carp and catla), 30-35% mid water feeders (rohu and grass carp) and 30-40% bottom feeders (common carp and mrigal) is commonly adopted depending on the productivity of the pond.
Post-stocking Pond Management
Fertilization:
The ponds are classified into three groups based on the nutrient levels of the soil substratum. Fertilization measures for carp production ponds are recommended as follows.While 20-25% of the total amount of organic manures is applied as basal dose, a fortnight before the stocking, the remaining amount is applied in equal installments on a bimonthly basis. Other commonly used organic manures include poultry litter, pig dung, duck droppings, domestic sewage, etc. depending on the availability. Azolla, a nitrogen-fixing fern has been standardized as a biofertilizer for aquaculture at an application rate of 40 t/ha/yr, proving the full complement of nutrients required for intensive carp culture (100 kg nitrogen, 25 kg phosphorus, 90, kg potassium and 1,500 kg organic matter). The detritus resulting from the decomposition of the material applied in ponds serve as at a trophic component of the carps and the prawns. The bioprocessed organic manure, biogas slurry, has been standardized as a manure in carp culture, at application rates of 30-45 t/ha/yr, with distinct advantages in terms lower oxygen consumption and faster nutrient liberation rates

Supplementary feeding: The supplementary feed in carp polyculture is usually restricted to mixture of groundnut/mustard oil cake and rice bran. With the shift towards intensive fish culture, other ingredients from plant and animal protein sources are being incorporated. To hold these components in the feed together, pelletization is done, which in turn helps for water stability and reduction of wastage. Grass carps are fed with preferred aquatic vegetation (Hydrilla, Najas, Ceratophylum, duck weeds, etc.) kept in enclosures in selected corners of the pond. Marginal vegetation, land grasses and other fodder, banana leaves and vegetable refuse can also be used.
In terms of feed dispensation, the feed mixtures are provided in the form of dough in trays or gunny bags hung at different places in the pond. Feeding preferably twice-a-day is advocated. Quantitative requirements of feed are important since underfeeding depresses growth while overfeeding results in wastage of food. Feeding is done @ 5% of the initial biomass of stocking material for first month and further at sliding scale from 3-1% in subsequent months, based on the fish biomass estimated at monthly intervals.
Aeration and water exchange: Aeration may be used mechanically to increase the concentration of dissolved oxygen in ponds, especially required in intensive culture with higher stocking density. Paddle wheel aerators, aspirator aerators and submersible pond aerators are the common aerators used. 4-6 aerators/ha water area is required to meet the demand of dissolved oxygen in intensive aquaculture.
Pond aeration
Water exchange is another important activity, considered to be crucial in intensive aquaculture. Due to continuous accumulation of metabolites and decayed unutilized feed, the water quality get deteriorated, leading to slow growth of fish species and often leading to outbreak of diseases. Thus, it is necessary to replace certain amount of water at regular intervals, especially during later part of the culture period in case of intensive culture practices.
Health management: Prior to stocking, the fish seed should be given a bath of 3-5% potassium permanganate for 15 seconds. Incidence of disease is quite common in high stocking densities. Though mortality is rarely observed in well-managed ponds, fish growth is severely affected due to parasitic infection which need to be attended.
Harvesting
Harvesting of fishes is usually done after a culture period of 10 months to one year. However, fishes attaining the marketable size can be harvested periodically to reduce the pressure of density on the pond and thereby providing sufficient space for the growth of other fishes.
Economics of Carp Polyculture

FRESHWATER AQUARIUM STUDY

Freshwater Aquarium Setup
1. Choosing the Right Aquarium:
Although it is important to choose an aquarium that you think will look good in your living room, there are other equally important considerations that affect the ongoing expense as well as the health of the inhabitants!
In general we have found that stability of the environment is the most important secret to successful fish keeping. A lot of material has been written about the ideal environment for various species of fish, whether they like warm water or cold water, high Ph or low Ph, hard water or soft water, but this is generally useful only if you are attempting to breed the fish or are planning on keeping a very sensitive fish that is known to be challenging. In choosing all of the items and the fish themselves, always keep in mind the stability of the environment.
One of the first choices you will face is whether to purchase a glass or acrylic aquarium. The differences are listed in the box below.
2. Size of the Aquarium
Always choose the largest size that fits your living room and your budget!
Don't be fooled into thinking that the smaller the aquarium the easier it will be. Actually, the larger the aquarium is the more stable it will be and the easier it will be to maintain healthy fish. The amount of oxygen available (which is critical to fish survival) is determined mainly by the amount of surface area of the aquarium (not just the size) since oxygen enters the water primarily at the surface. Although aeration, with an air stone or a power head, seems like it is directly adding oxygen to the water, most of the benefit comes from moving water from the bottom of the aquarium to the surface where oxygen is exchanged for carbon dioxide.
Water movement at the surface also increases oxygenation and will generally increase the stocking capacity as well as the health of the fish. Keep in mind that airstones and powerheads can (and generally will) fail at some time or another so don't overstock an aquarium to the point that your fish will die if the power goes out for a couple of hours! It is almost always more desirable to have a few less fish that are colorful and healthy than to push the limits of the tank and risk loosing some of your fish. Not only are fish happier, but the maintenance is easier!
The larger the aquarium, or the fewer the fish, the greater is your chance of having a successful experience!

3. Filters and Filtration
There are three main types of filtration for freshwater aquaria: biological, mechanical, and chemical.
Utilizing each of these three types of filtration will provide you with the most stable and most easily maintained aquarium. General aquarium filters manufactured today include each of these three main types of filtration in some manner.
We will also mention several other methods below, that are more commonly used in reef systems, but that can also be beneficial for fish only systems.
The three main types of filtration are:
1. Biological Aquarium Filtration:
This is the most important type of filtration for stability and reduction of toxic wastes.
Nitrification: In any biological environment there will be a production of ammonia from normal respiration (fish release ammonia from their gills) and the breakdown of wastes. Ammonia is toxic to fish and in nature is reduced to nitrite by a bacteria called Nitrosonomas. Nitrite is also poisonous to fish and is further broken down into nitrate by bacteria called Nitrobacter. Nitrate is relatively harmless to fish but is a primary food for plants and algae. Frequent water changes (say 10% every week or two) will control nitrate levels. Collectively the process of turning ammonia to nitrate is called nitrification and is carried out in the presence of oxygen (aerobic conditions).
Denitrification: This is the process where nitrates are converted to nitrogen gas in the absence of oxygen (anaerobic conditions). Denitrification is generally not of concern to the freshwater aquarist unless the control of nitrates is desired (See Reef Aquarium Basics ).
Sponge filters work by passing water over a highly porous sponge where bacteria are allowed to grow. They are almost purely biological with some mechanical filtration provided by the sponge itself. The sponge should not be cleaned or allowed to dry out because this will kill the nitrifying bacteria. Sponge filters are good for breeding situations where very small fish are at risk of being sucked up by the strong intake currents of canister filters or overflows. They are also good for fish like bubble-eyed goldfish that may be injured by strong intake currents of power or canister filters. Sponge filters can be powerd by air pumps or small water pumps.
Undergravel filters are the most common type of biological filter and work by pulling water down through a bed of gravel at the bottom of the aquarium and pulling it up through the uplift tubes. Reverse flow undergravel filters are set up to pull water from the top of the aquarium by pushing it down the uplift tubes and up through the gravel. Reverse flow filters are slightly more efficient since they take water from the top of the aquarium which contains more oxygen.
Since nitrification is more efficient in the presence of oxygen and the air contains about 20% oxygen, as compared to about 7% oxygen for water, trickle or wet/dry filters were developed in the 1980's which increased the efficiency of biological filters dramatically. They place the bacterial growing medium, filter balls with large surface areas, in the air (usually outside the aquarium) and trickle the water to be filtered over them. Many kinds, sizes, and shapes of trickle filters have been in use since they were introduced. Although many trickle filters are external devices used in a sump or hang on the back type of filters, several manufacturers including the "Sea Clear System II" aquarium contain trickle filters built into the back of the aquarium itself. The problem with trickle filters is they usually produce high levels of nitrate, and so are not often used in reef aquariums or other situations where nitrates are undesireable. Read more about nitrates here.
Canister filters have a containers or baskets inside the filter for various filter media. For biological filtration you would fill it with some sort of biological media, such as bio balls. This media will either come with the filter or can be purchased separately. Once the bacteria colony has been established on this media you will not need to remove it or clean it.
Standard Power filters use disposable cartridges that have a floss pad surrounding them. This pad is primarily for mechanical filtration but will also house nitrifying bacteria. The drawback to this as a primary biological filter is when you dispose of the cartridge, you dispose of the bacteria colony as well. Today there are more advanced power filters that include a separate area for biological media. These are usually in the form of a compartment in the filter filled with biological media or an attached external 'bio wheel', a pleated wheel that the water flows over as it is leaving the filter and returning to the aquarium.
2. Mechanical Water Filtration:
Mechanical filtration is good for keeping the water clear and free of debris!
Mechanical filtration refers to the removal of particulate matter from the aquarium. Canisters and power filters which force the water through some kind of floss or pleated cartridge are both examples of mechanical filtration. Some canister filters such as the "Hot Magnum" provide one media basket for your choice of mechanical filter media or carbon. Other canister filters have more than one basket for a combination of mechanical, chemical (carbon), and biological filtration. Undergravel filters also act as mechanical filters by trapping debris in the gravel. This is one reason the gravel should be siphoned periodically to remove trapped debris.
Diatomaceous earth filters, commonly available in canister filters, can remove particles as small as 3 microns in size which really 'polishes' the water. They can be used to remove bacteria and algae blooms but generally clog after a short period of time and should not be used on a continuous basis.

3. Chemical Aquarium Filtration
Chemical filters are most useful in getting rid of the yellow color that often develops in aquarium water over time!
Chemical filters are used to remove things that are dissolved in the water, and therefore cannot be removed by mechanical filters. The most common chemical filter is activated carbon, used mostly in canister and power filters, it traps many substances in it's minute pores.
According to Martin Moe in his book, The Marine Aquarium Handbook, some of the substances removed by activated carbon are: copper, ozone, chlorine, antibiotics, some dissolved proteins and carbohydrates, iodine, mercury, cobalt, iron, methylene blue (a common medication), malachite green (another medication), sulfa drugs, organic dyes, and many other elements and compounds.
Other chemical media include:
• Ammo-chips for removing ammonia
• Nitra-zorb for removing nitrates
• Phos-zorb for removing phosphates
Nitrate and phosphate control is usually not needed in freshwater aquariums unless the levels become very high, or there is a continual problem with undesireable algae blooms.
Mini-reef aquariums are the most likely candidates for nitrate and phosphate removers if other means of control don't work.
Note: Many of the common aquarium medications including antibiotics are removed by activated carbon. Therefore activated carbon should not be used when treating the aquarium for disease.
Other aquarium filtration methods:
Foam Fractionators, or protein skimmers
Protein skimmers work by passing a large stream of small bubbles through a column of aquarium water. Many different substances (proteins) will adhere to the surface of the bubbles and be removed from the water in the foam that bubbles from the top.
Skimmers are beneficial because they remove substances before they enter into the nitrification cycle which reduces nitrates and increases oxygenation of the aquarium water. One of the drawbacks to skimmers is that they remove trace elements and iodine which, if needed by any of the aquarium inhabitants, must be replaced periodically. This is not usually an issue in freshwater or saltwater aquariums, but both types can benefit from the use of a protein skimmer.
Ultraviolet sterilization
Ultraviolet sterilization works by passing water through ultraviolet light. If the water is exposed long enough, at a high enough concentration of light, bacteria, algae, and parasites can be destroyed by the light. This is used extensively in ponds to help with algae and green water. Treatment of diseases in aquariums requires the most amount of exposure. The smallest units ( 8-9 watt) are made for tanks up to 50 gallons, while the larger 40 watt units are made for tanks up to 180 gallons. For pond applications, 8 watts per 1000 gallons is needed to kill off algae (green water) but is not effective for disease control.
Ozone
Ozone can be passed through aquarium water to oxidize all forms of organic pollutants and kill many of the same organisms that ultraviolet radiation does. Commonly used in skimmers, one should make certain the materials used are "ozone safe" and that the water is passed through activated carbon before returning it to the aquarium because any residual ozone in the water is extremely toxic to the fish. Ozone is useful mainly in large public aquariums and ponds to keep the water from coloring.
Choosing the Inhabitants
1. Stocking Capacity of a Freshwater System
The first thing you probably want to know is how many fish you can keep in a particular sized aquarium.
The two most common formulas for the amount of fish you can safely keep are:
Simple method: Keep one inch (1") of fish for each one (1) gallon of water.
This simple method doesn't take into account the surface area of the water (for oxygenation), the filtration system (for removal of wastes), and the general size of the fish. For instance, a fish that is 6 inches long needs a lot more oxygen than 6 fish that are 1 inch long. In general you should reduce the amount of fish if they are larger, and increase the amount of fish if they are smaller.
Surface method: Calculate the surface area of the aquarium.
Multiply the length of the aquarium times the width of the aquarium (in inches) and divide by 12 to get the number of inches of fish the aquarium can handle.
This surface method takes into account the aquarium shape but not the filtration or the size of the fish. The second formula favors aquariums that are shorter and wider i.e. not 'showtanks' which are taller and skinnier.
Note: Neither formula is for coldwater aquariums! In coldwater aquariums you should keep about 2 1/2 times LESS fish than in a tropical aquarium. This means that the surface area should be divided by 30 to get the number of COLDWATER fish for a freshwater aquarium.
In general the more complicated formulas are not worth the trouble if you don't approach the maximum number of fish calculated by the above formulas. Perhaps if anyone shows interest, we can write more on this later.
2. Community Aquarium? or Species Aquarium? One of the funnest things about setting up an aquarium is choosing the fish!
You should probably have some idea of what type of fish you want to keep before stocking the tank to avoid problems later. Do some research on each fish before adding them to your aquarium.
Some fish are predatory or aggressive and so should be kept either by themselves, or with other predatory species. Aggressive species include Oscars, Jack Dempseys and many cichlids.
Some fish are slow feeders, or are very shy and should be kept by themselves in a species tank. A good example of this is Discus fish.
________________________________________
Maintenance, Care, Feeding
1. Water Quality
By most accounts freshwater systems need partial water changes on a regular basis.
The recommended water change is to change about 15% per month. Note that this is lower than what is usually recommended for saltwater. In deciding how much and how often you wish to do water changes, keep in mind that for stability, smaller water changes done frequently are best. The main reason for water changes is to remove compounds that are not removed by any of the filtration methods such as nitrates and phosphates. Water changes also serve to replenish trace elements, and to clean the gravel of accumulated detritus and waste.
Any activated carbon you are using should be replaced monthly.
2. Feeding
Make sure and find out any special feeding requirements your fish may have before purchasing them and be sure you can provide them what they need!
In any case, get your fish to eat as many different kinds of food as you can to ensure they are getting everything they need. Some fish are used to eating all the time so they should be fed as often as is practical (always small amounts at least once per day) while others, like eels can go for several days without food at all. The more you feed your fish the faster they will grow to their maximum sizes.
Aquarium Set-up Basics
1. Obtain as large an aquarium as possible.
2. Purchase the following aquarium set-up components.
• For filtration we recommend an undergravel filter for both stability and ease of maintenance. Provide a minimum of 2 inches of some kind of non-calcerous gravel on top of the undergravel filter.
• Buy a thermostatic heater, thermometer, and either a good air pump with airline tubing, or a powerhead that pumps at least 3 times as much water per hour as the size of the aquarium.
• Make sure you purchase some kind of a water conditioner that removes chlorine unless you know there can be no chlorine added to the water. It is better to be safe than sorry in this situation.
• Purchase test kits for ammonia and nitrite (minimum).
• Now is also a good time to buy any ornaments that meet your fancy.
3. Set up the aquarium on a sturdy floor in a draft free area
• Put the undergravel filter in place with either the air stones or the powerheads in the uplift tubes.
• Rinse the substrate material thoroughly before placing it on top of the undergravel filter.
• Fill the aquarium with water, be sure you treat it with a chlorine remover.
• Place the heater, ornaments, thermometer, and any lights in or on the aquarium.
4. Run the aquarium for several hours.
• Let the aquarium 'run' for at least a few hours, preferably 12-24 hours, so the water is oxygenated and the temperature is stabilized.
5. Cycle the Aquarium and then add fish
• Three methods of cycling the aquarium are described here, see Cycling the Aquarium.
• You must monitor the ammonia and nitrite levels, using test kits, until they are both zero (or very close to zero). During this period (called the nitrification cycle) the ammonia will peak first then drop off as the nitrite peaks, then the nitrite will drop off to complete the cycle. The aquarium is cycled when they are at zero and that will indicate when it is safe to add fish.
• Don't add fish in the middle of this process. The initial fish will have a good chance of surviving because the levels go up gradually instead of all at once, so they are able to adapt to these changes.
• After about six weeks, when the aquarium has "cycled", it will be safe to add additional fish. This is indicated by the levels of ammonia and nitrite having drop to zero.
• Add new fish slowly and keep an eye on the ammonia and nitrite levels to make sure the aquarium is stable.
REF: http://animal-world.com/encyclo/fresh/information/freshwater.htm

